Creating a Visual Integrator (VI) script in Workbench consists of the following tasks:
- Position the script in the project
- Insert one or more input objects
- Insert one or more process objects
- Insert one output object
- Run the script
To place an object on the task flow panel, you can use either a right-click menu item or click the object in the object palette. In this example, the right-click method is used because it aids in connecting objects together.
To create a Visual Integrator script:
-
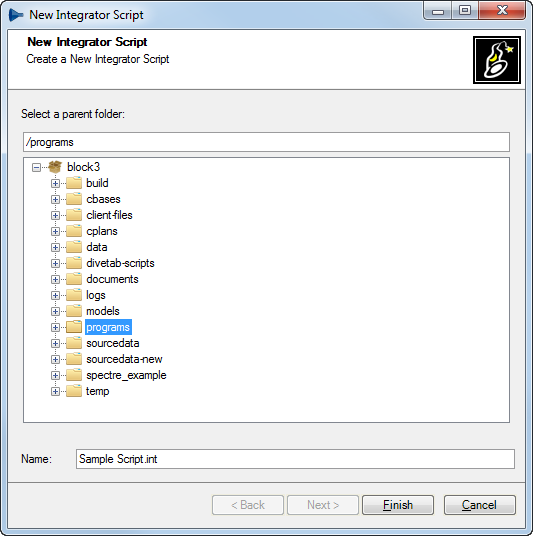
Click File > New > Integrator Script.
-
Select a folder and enter a name for the script in the
 New Integrator Script dialog box.
 -
Click Finish.
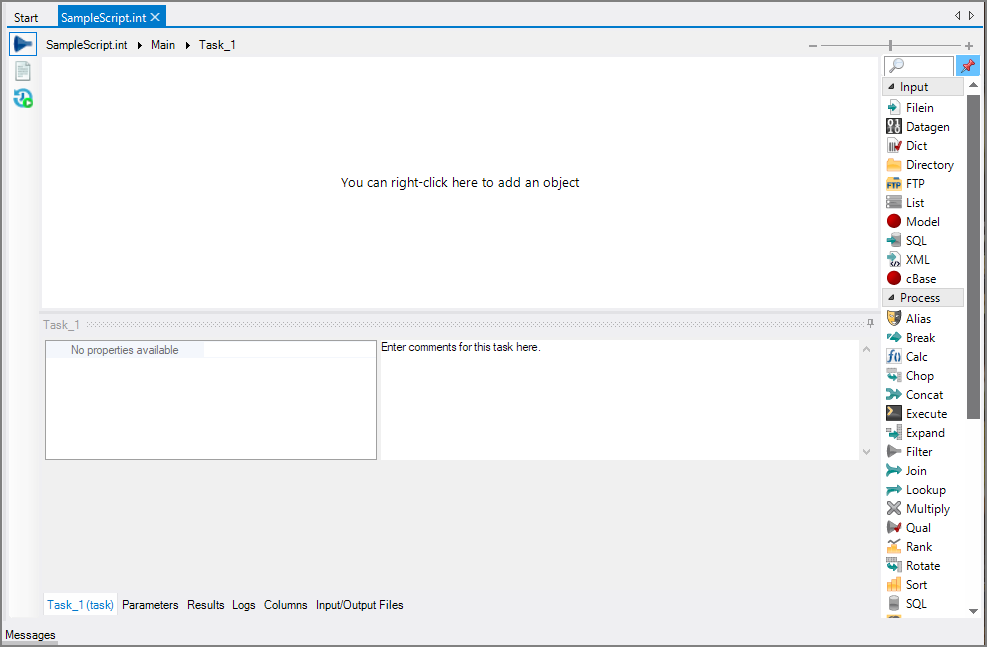
A blank script opens in a
 new tab.
NOTE: You can alternatively right-click on a folder in Workbench Explorer and click New > Integrator Script. The new script opens directly and focus is set to rename the file in Explorer.
In this example, a Filein input object is used to bring in data from a text file.
To insert a Filein input object:
-
Right-click anywhere on the task flow panel and click New Object > Input > Filein.
-
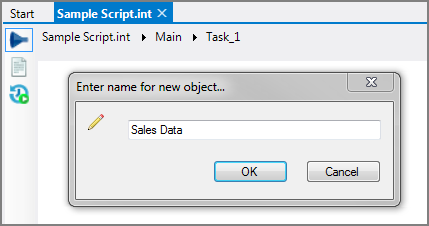
Accept the default name or change the name in the
 Enter name for new object dialog box.
NOTE: Default names for objects contain a number—starting with "1." For example,"Filein-1-FIN" with the Filein object. If you add additional objects of the same type, that number increments.
-
Click OK.
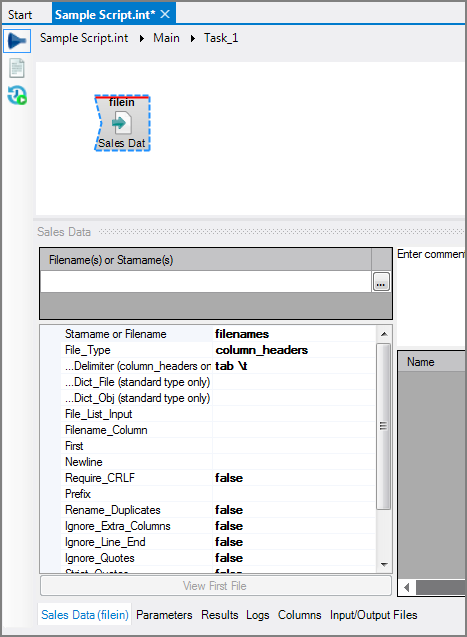
The Filein input object is placed on the task flow panel.
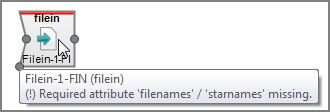
NOTE: There is a red bar at the top of the Filein object, which indicates that a required attribute is missing. Hover the mouse over the object for a
 pop-up description of the required attributes. In this example, the missing attribute is filenames / starnames. The blue dashed outline indicates that the object is selected, which effects what displays in the object properties panes.
TIP: There is a VI preference setting where you can require that each object have a note. See Visual Integrator Preferences.
-
With the Filein object selected, in the object properties pane, click the browse button (ellipses) for Filename(s) or Starname(s).
-
Navigate to and select the data file in the Select File dialog box.
-
Save the Integrator script.
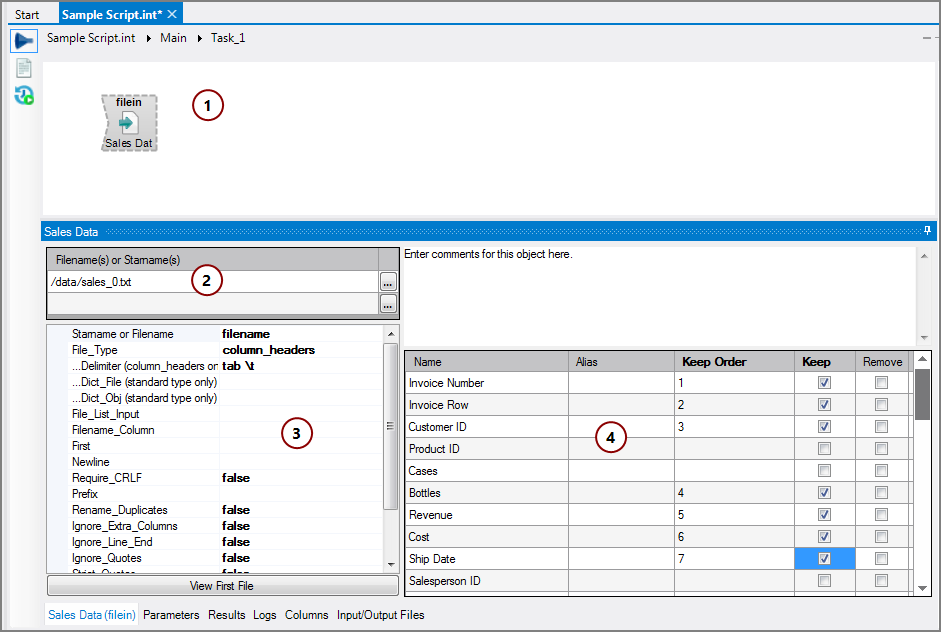
Take note of the following changes to the display. (The number for each change references the numbers in this ![]() screen shot):
screen shot):
-
The red bar in the Filein object is gone because the required attributes are met (1).
-
The path to the input data file appears (2).
NOTE: You can return to the Filename(s) or Starname(s) attribute and enter additional data files.
-
The Filein object properties pane has additional attributes that you can use (3).
-
The columns display where you can set which columns to keep, specify the keep order, and add aliases (4).
NOTE: You can refresh the columns when you know that the underlying data file has changed. To refresh the columns, right-click > Refresh Columns or click Edit > Refresh Columns.
For detailed information about the attributes found in the Filein object properties panes, see VI Filein Input Object.
In this example, an Alias process object is used to change the names of columns.
To insert an Alias process object:
-
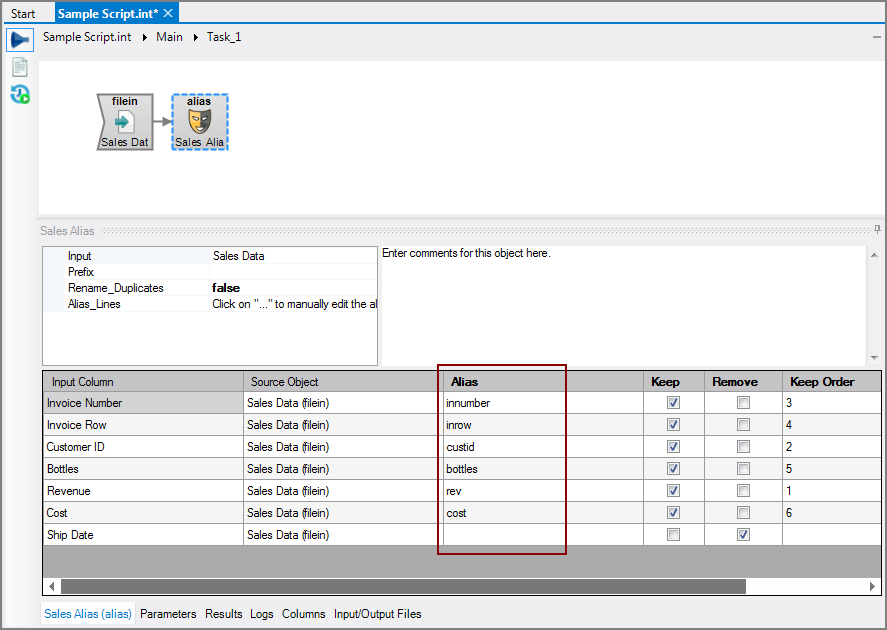
Right-click the existing Filein object and click New Object after this > Process > Alias.
An Alias object is placed in the task flow panel attached to the Filein object with an arrow indicating the flow.
TIP: You can reset the flow of arrows connecting objects.
-
In the properties pane for the selected Alias object, enter
 alias names for several of the columns.
 -
Save the Integrator script.
For detailed information about the attributes found in the Alias object properties panes, see VI Alias Process Object.
In this example, a Fileout output object is used to place the transformed data into a text file.
To insert a Fileout output object:
-
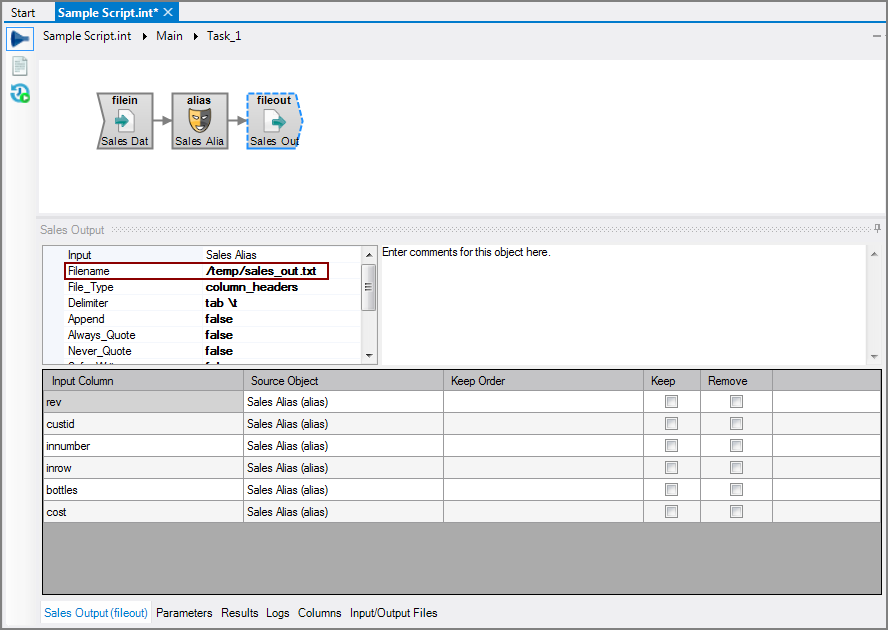
Right-click the existing Alias process object and click New Object after this > Output > Fileout.
-
In the object properties pane, click in the
 Filename attribute box and enter a path and file name or use the browse button.
Notice that the Fileout object now displays the alias names under Input Column.
-
Save the Integrator script.
For detailed information about the attributes found in the Fileout object properties panes, see VI Fileout Output Object.
When the script is complete, you can run it and inspect the results.
To run the Visual Integrator script:
-
Click Run > Run Script.
NOTE:
- With a task open, you can right-click > Run Task or Test Task to run or test an individual task.
- If there are unsaved changes in the script, the Script has unsaved changes dialog box opens with choices on how to proceed. See Running Unsaved Scripts for information about these choices and how to set your Workbench preferences to change the default behavior.
-
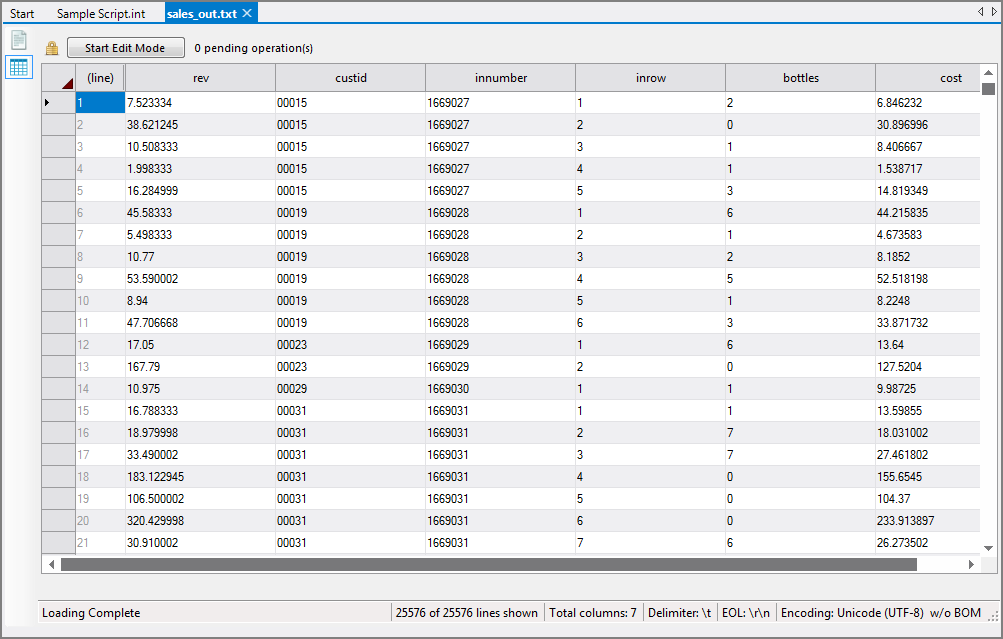
The script runs and opens a new tab to display
 the contents of the output file.
 NOTE: See Visual Integrator Preferences (Visual Integrator > Behavior for Runs) to set VI to open the Table Editor upon successful script runs.
-
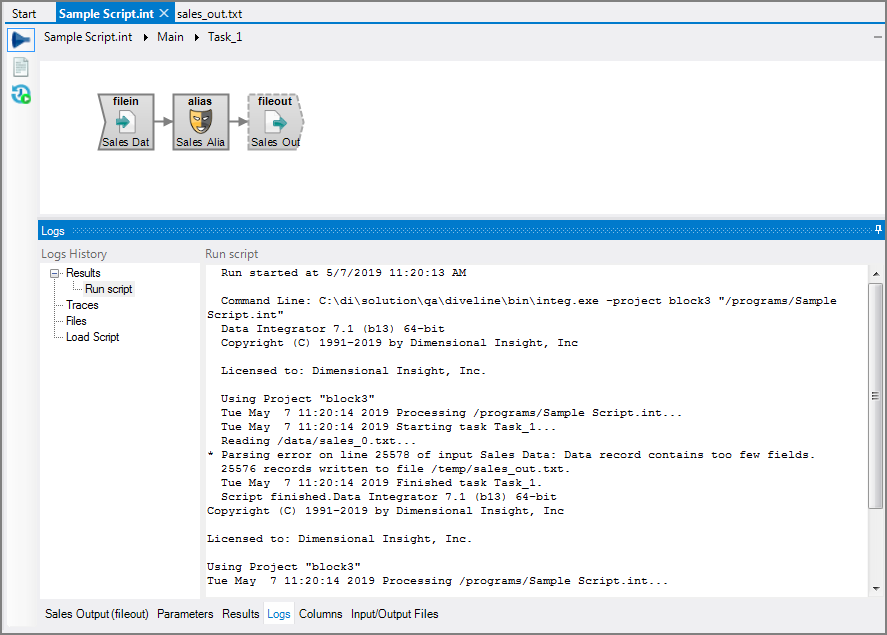
Return to the script tab—the
 Logs panel displays in place of the properties panel.
 -
Inspect the log as well as the output file to see the transformation of the data.
For more flexibility, see Parameters in Visual Integrator.
