Before you can use ProDiver to create a map, you must install a map data set. Upon request, DI support provides a US map data set, free of charge. For more information, see About Map Data Files.
You can create point maps or boundary maps.
NOTE: The active dive window must contain geographic data.
To convert the contents of an active dive window to a map:
-
On the toolbar, click the Graph icon
 .
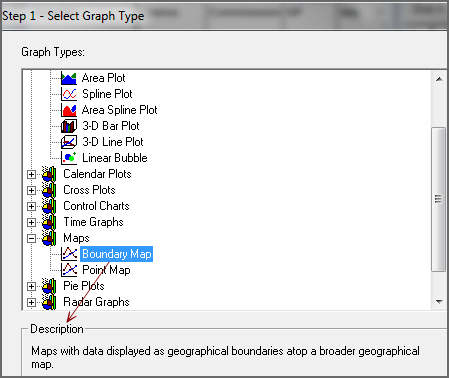
.The Select Graph Type
 dialog box opens. This is the first step in the graph creation wizard.
 TIP: Click a graph type to see a description in the Description box.
-
Double-click the map type that you want to create.
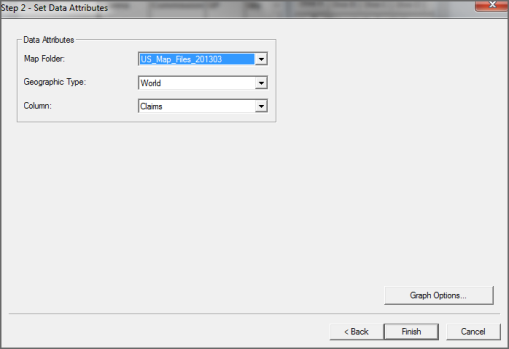
The Set Data Attributes dialog box opens. The data attribute options vary, depending on the selected graph type. This
 example shows data attributes for a Boundary Map.
 -
Select a map data set from the Map Folder list.
-
Select an option from the Geographic Type list.
-
Select a data column for the map from the Summary Column list.
-
If you want to further customize the graph, click Graph Options. Otherwise, click Finish to view the graph.
For more information, see Selecting Graph Options.

