This topic presents a high level overview of the Spectre Build Editor.
From the menus, select File > New > Spectre Build File.
A basic input and output flow is created:
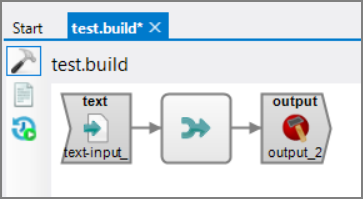
The Spectre Build Concat object  is a junction point in the build script enabling the flow of data from one or more data sources. Operations applied before the concat object are applied to that input flow only. Operations applied after a concat are applied to all the data.
TIP: There is a right-click context menu item, Convert Object To, available from the Text Input object that allows you to convert it to an alternative type such as cBase Input, Dive Input, ODBC Input, or Tunnel Input.
To add another data source, right-click on the flow canvas and select Add Input. Choose an option from the list presented.
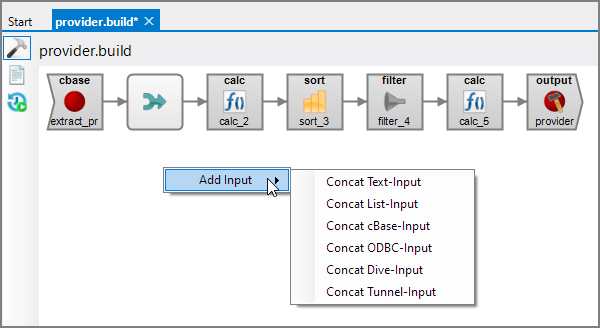
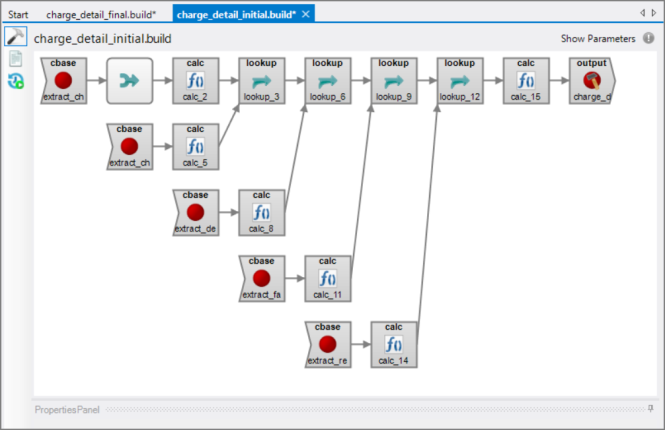
Note that each input flows into a Concat object, representing the main flow into the builder. Additional objects such as calcs, sorts, lookups and joins are added to the right of the Concat object.
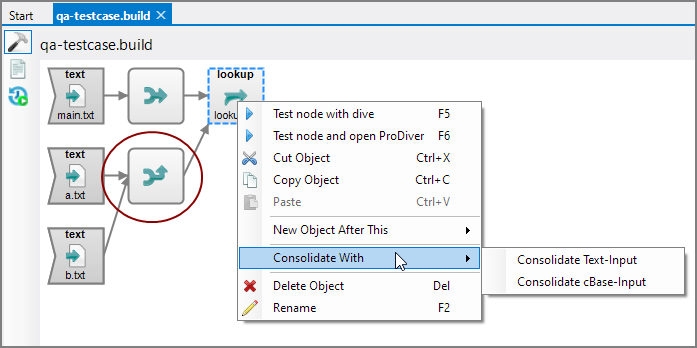
Lookup objects support multiple inputs using the Consolidate With option available from the ![]() context menu.
context menu.
To add a new object, right-click on an existing object and select New Object After This. Choose an option from the list that is presented.
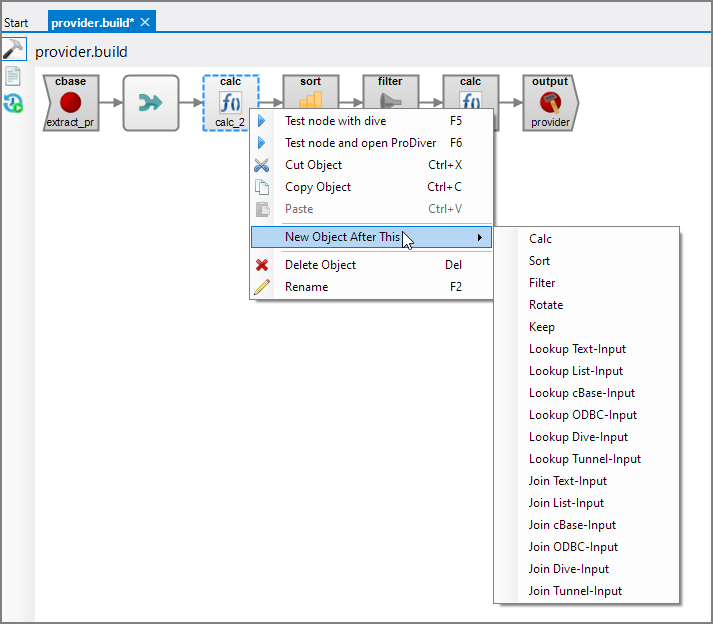
The object is added and selected for edits.
Alternatively, you can right click on an object, then select Cut Object, Copy Object, or Paste to expand your data flow.
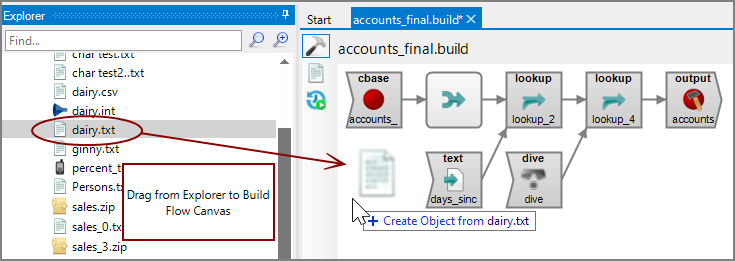
You can drag an appropriate file from the Explorer pane onto the build flow canvas. It becomes an input to the Concat object.
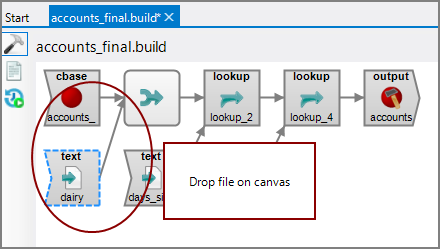
If you drag the file and drop it on a specific node, you will be given the choice of adding it as a Lookup or as a Join object.

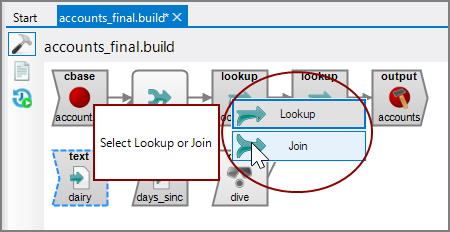

TIP: If you drag and drop a file directly onto the Concat object, you are presented with 3 choices: Concat, Lookup, or Join. Concat adds the object before Concat; Lookup and Join add the object after the Concat.
Each type of object in the build flow has a properties panel where attributes are listed. Select the object to display the panel.
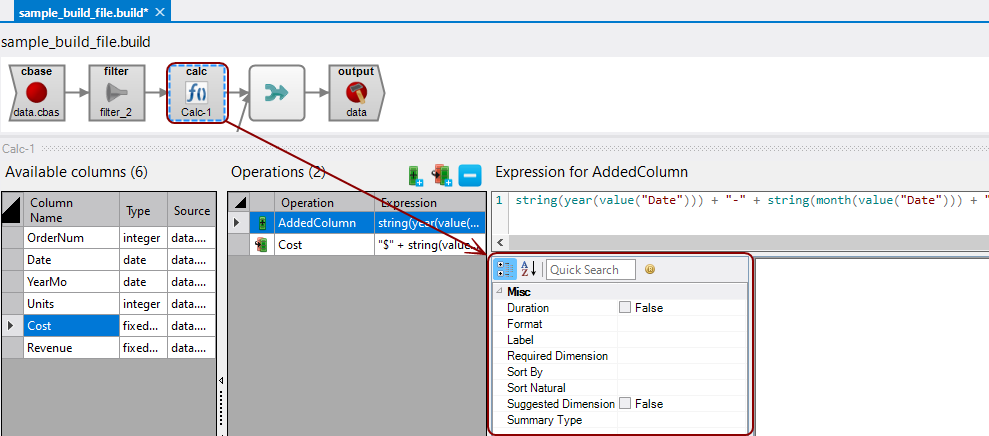
Make selections and enter details as required. See Spectre Properties for more information.
To test a node, select it on the flow canvas, right-click and select Test node and open ProDiver.
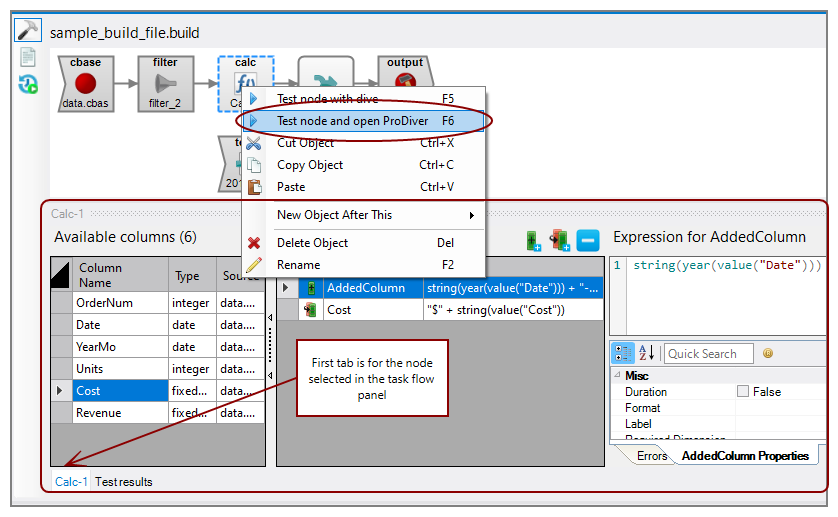
The object runs and builds a temporary cBase that opens in ProDiver where you can examine the data. You can also examine the log file in Workbench.
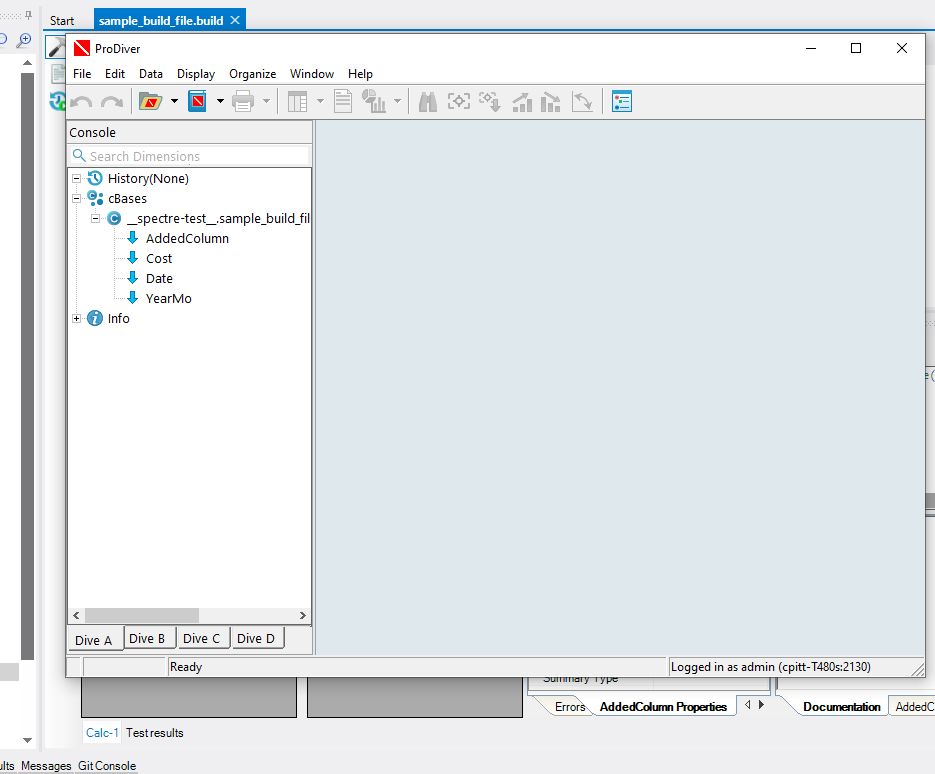
Alternatively, right-click a node and select Test node with dive. A temporary Dive is generated and runs.

The Test results pane display at the bottom.
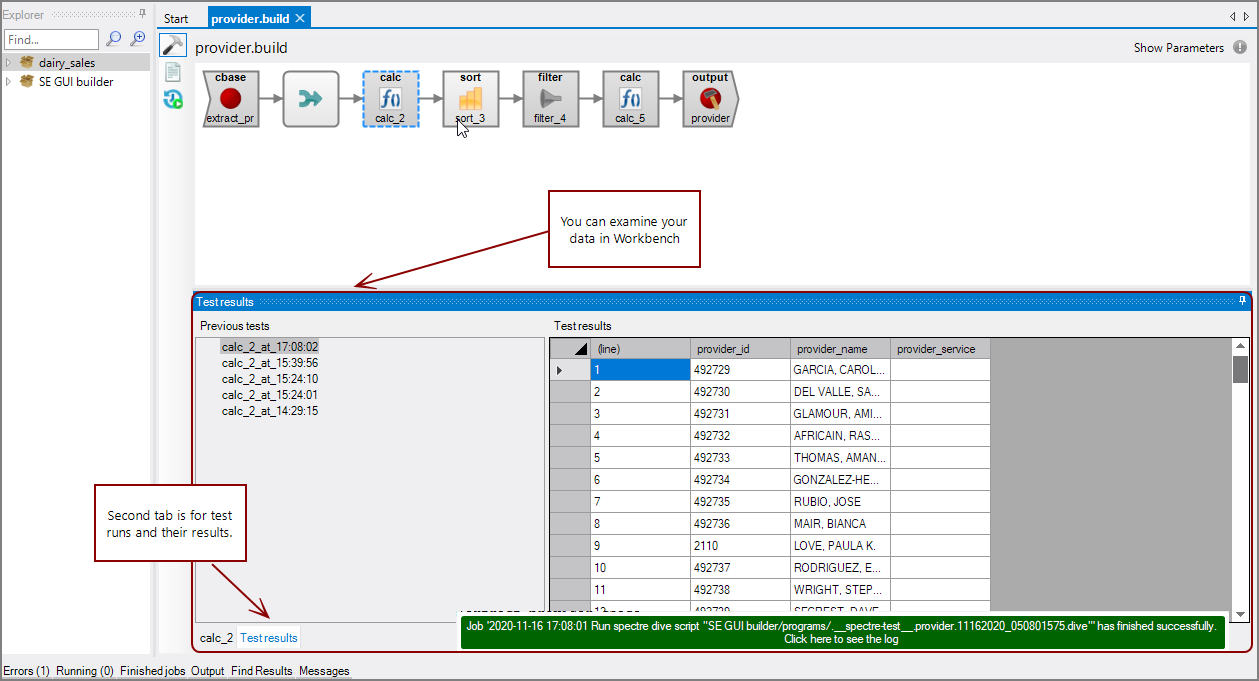
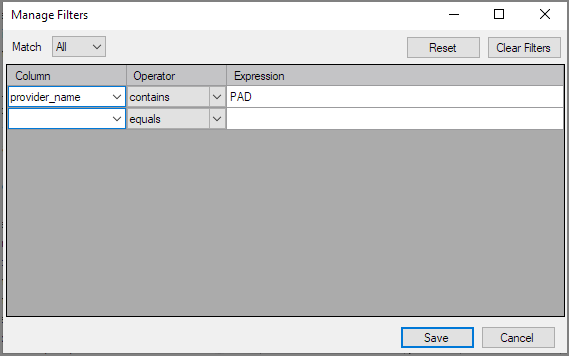
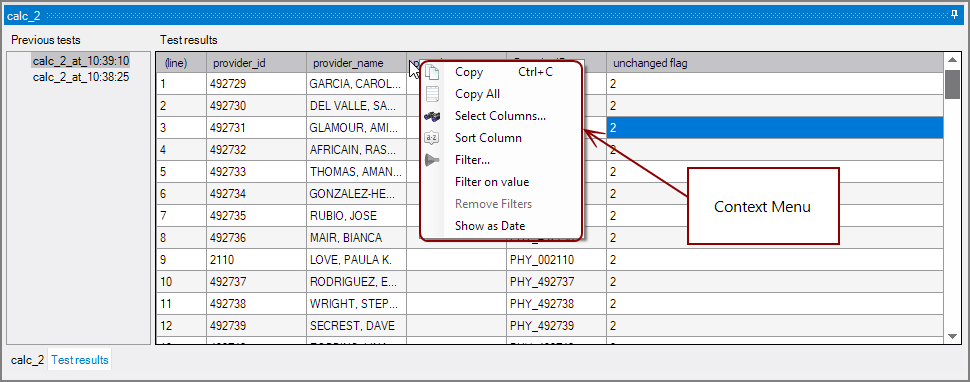
Starting with Workbench 7.1(19.1), ![]() Filter
Filter![]() Select Columns
Select Columns
With the build script displayed, go to the toolbar and locate and click the Run icon (green arrow).

You can examine the results using the Output tab located at the bottom of the Workbench main window space, or you can click the Run History icon.

The run-history display allows you to examine the current and prior executions of the script. See Processes Tab for more information on run histories in Workbench.
You can use parameters to facilitate, for example, dynamic filenames and variable calculations. To work with parameters, on the right end of the flow panel, click Show Parameters.

The Parameter grid displays in the properties panel. Add and edit parameters in the grid.
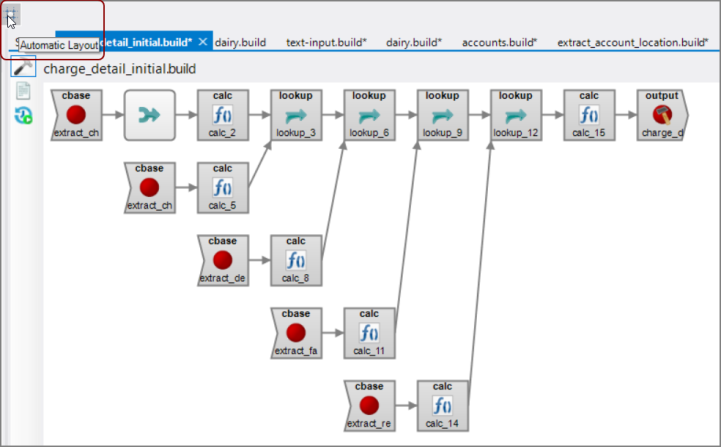
Working with a script, adding and deleting objects can look messy in the Build Flow Editor.
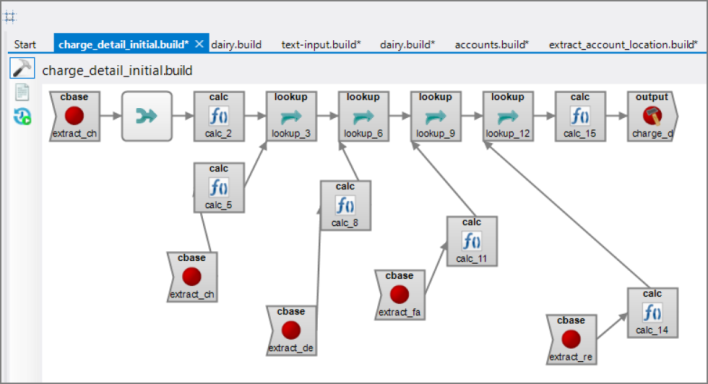
You can fix the layout by clicking the Automatic Layout icon on the toolbar.
You can switch from the graphical Build Flow Editor to the script. To the left of the flow panel, locate and select the Text Editor icon.

The build script opens in the context-sensitive text editor.
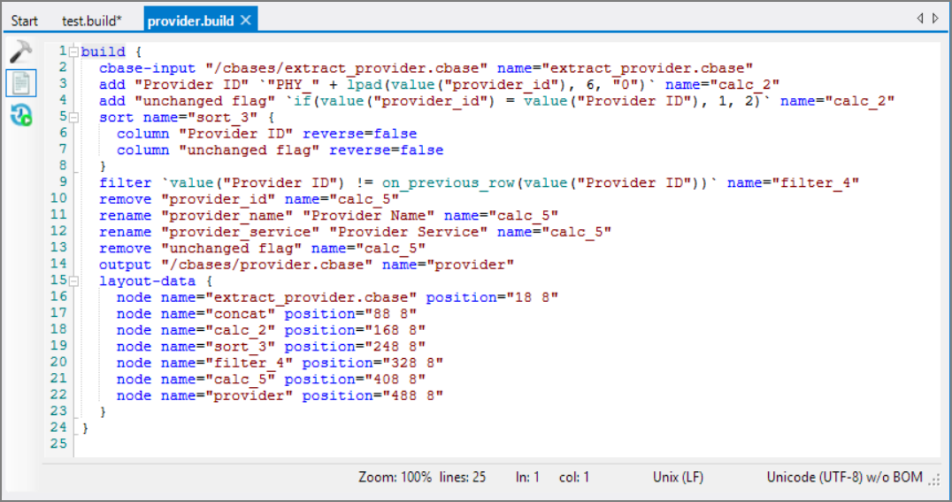
The first time you open an existing script in the Spectre Build Flow Editor, some metadata is added to the script. When the editor does this, it shows a modal popup: "Workbench has added UI related data to script". Click OK to dismiss the popup. If you examine the build script, you will see a new layout-data block created to support the GUI display.
