The Visual Integrator (VI) Builder output object creates a DI Model from the data flow.
![]()
The Builder output object has ![]() four panes where you set attributes.
four panes where you set attributes.
Set attributes for the Builder output object in the ![]() object attributes pane.
object attributes pane.
The attributes are organized in the following categories:
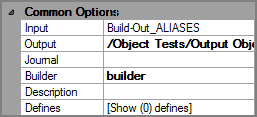
| Attribute | Description |
|---|---|
| Input |
Defines the object from which the data flow arrives. Use one of the following methods to attach the Builder object to an input data flow object:
|
| Output |
Defines the name and path of the model that this object creates. Enter a path and file name in the Output box, or use the browse button to select the file. If a Description attribute is defined, this attribute is not necessary. |
| Journal |
Defines the name and path of the journal file that records parse errors in the input and provides a record of the dump key information. Enter a path and file name in the Journal box, or use the browse button to select the file. If not indicated, a file named build.jou is placed in the same directory as the VI script. |
| Builder | Points to the location of builder.exe. Workbench should automatically find the executable file. If necessary, click in the Builder box and select the executable file if one is listed, or click the browse link and navigate to the executable file. |
| Description |
Specify the name of a Build Description file. Enter a path and file name in the Description box or use the browse button to select the file. A Build Description file is a configuration file that controls the actions of the build. Using the Build Description file provides a way to easily repeat builds without having to retype each option. If a Description attribute is defined, the Output attribute is not necessary. |
|
Defines |
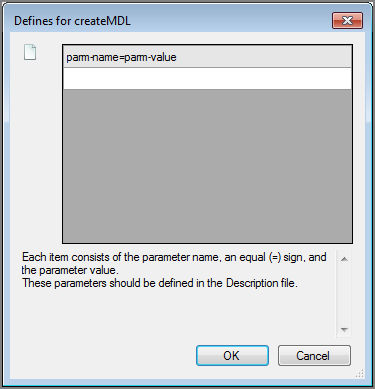
Defines values for existing parameters that are defined in the Build Description file. This attribute is only used if you are using a Description attribute and the specified Build Description file has parameters defined. The Defines attribute displays the number of parameters defined. It defaults to [Show (0) defines]. Click the browse button in the Defines box to open the <parm-name>=<parm-value> |

By default, summary types are not calculated and only the total summary is calculated.
| Attribute | Description |
|---|---|
| Sum_Type_Maximum |
Defines whether to calculate the maximum number of summary types.
|
| Sum_Type_Minimum |
Defines whether to calculate the minimum number of summary types.
|
| Sum_Type_Std_Dev |
Defines whether to calculate the sum of the squares of the column values..
|
| Index_Dimension | Creates a single-dimension model that is suited for lookups or single-dimension index models. No other dimension selections in the Model Structure are allowed when using this attribute. |
| Index_Model |
Defines whether to create an index model.
|

| Attribute | Description |
|---|---|
| Journal_Append |
Defines whether to append build information in the journal file or to overwrite it.
|
| Bucket_Dir | Specifies the directory used to store the temporary sort files. By default, buckets are stored in the current directory. Click the browse button to select a different directory. |
| Output_Dict | Creates a dictionary file that describes the file created by the Output_Text attribute. Enter a path and file name in the Output_Dict box, or use the browse button to select the file. |
| Output_Text | Creates a new file containing the input data from the current input file with just the columns used in the build. This attribute is useful with calculated fields, as the text file output contains the calculated field values for each line. Enter a path and file name in the Output_Text box, or use the browse button to select the file. |
| Attribute | Description |
|---|---|
| Blocking_Factor |
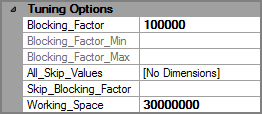
Defines the amount of pre-processing. Pre-processing allows ProDiver to respond faster. The larger the block factoring, the less pre-processing is done. The default value is 100000 rows. The list has the following values: 100000, 50000, 20000, 5000, and 10%. You can enter another value if required. If the blocking factor is expressed as a percentage, the block factor is re-calculated for the model being built, and then the Blocking_Factor_Min and Blocking_Factor_Max attributes become available. |
| Blocking_Factor_Min | Defines the minimum blocking factor to use when the Blocking_Factor is given as a percentage of the input records. If the calculated block factor is less than this minimum, the minimum is used instead. The default minimum is 10,000. |
| Blocking_Factor_Max | Defines the maximum blocking factor to use when the Blocking_Factor is given as a percentage of the input records. If the calculated block factor is greater than this maximum, the maximum is used instead. There is no default maximum. |
| All_Skip_Values |
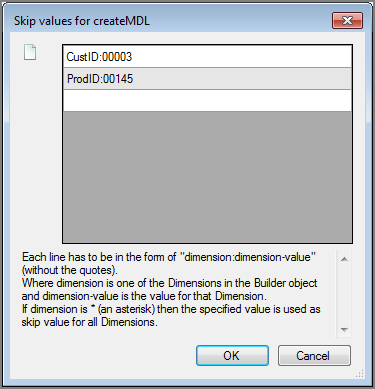
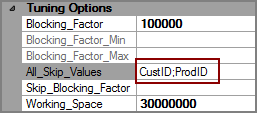
Specifies dimension values to skip when summarizing data. When Builder summarizes data for the specified dimension value, it uses the large blocking factor, optionally defined by the Skip_Blocking_Factor attribute. This reduces the amount of pre-processing done for these data values, but diving into these values is slower. Use this option for dimension values that you do not expect users to dive on. To define values, click the browse button to open the dimension:dimension-value Just the dimension names appear in the If you set the dimension to an asterisk (*), the specified value is used as skip value for all dimensions. |
| Skip_Blocking_Factor | Specifies the block factor used for skipped dimension values. This attribute defaults to the number of records, which is the largest possible value. |
| Working_Space | Specifies the amount of available space for swapping information during the build. The default value is 30000000 (30 MB). Unless the file is large enough to cause errors, DI recommends not changing this value. |
| Attribute | Description |
|---|---|
| Model_Encoding |
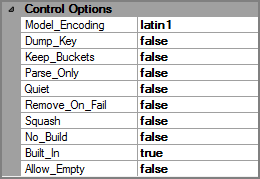
Defines the encoding used to create the model:
|
| Dump_Key |
Assists in debugging.
|
| Keep_Buckets |
Indicates if temporary sort files, referred to as bucket files, are kept.
|
| Parse_Only |
Determines if the Builder object checks the input file for errors without creating a model.
|
| Quiet |
Indicates whether to suppress the display of phase progress information during the build.
|
| Remove_On_Fail |
Specifies the action for a failed build.
|
| Squash |
Specifies how to handle duplicate rows.
|
| No_Build |
Specifies whether the Builder processes options without building a model.
|
| Built_In |
On Windows servers, determines whether to use the internal or external Builder.
|
| Allow_Empty |
Defines how to handle scripts that return no records due to the parameters that are used to filter the data.
|

| Attribute | Description |
|---|---|
| Extract_Time |
Describes when the input data was extracted from the source data. If blank, the extract time is set to the build time. If set, use one of the following formats:
If no time is specified, the time is set to noon of the date. For more information, see the ProDiver Help > About Text Variables. NOTE: The build time is recorded automatically and is available in Diver Reports using $BUILD_DATE and $BUILD_TIME. |
| Comments |
Specifies a comment that is available from the ProDiver Open File dialog box's Get Info button. Limit is 100 characters. This can also be accessed in ProDiver using the report variable $COMMENTS |
| Footer |
Specifies a string to appear at the bottom of every page printed from ProDiver. It is accessed by using the variable $MODEL_FOOTER in the ProDiver report or report palette. |
| Model_Vars |
Specifies the user-defined model variables for the model. Click the browse button to open the Variables use the following form: <variable_name>=<variable_value> These model variables are available in ProDiver through the $MODELVAR reporter variable. |

| Attribute | Description |
|---|---|
| Update |
Indicates whether to update the model with incremental build data, which places additional data in a separate file with an mdu extension. When the model is opened, the mdu data is seamlessly included in the model. Repeated use of the Update attribute increases the size of the mdu file.
|
| Compact |
Indicates whether to do a full build that merges incremental files with the main model and recovers space from incremental builds.
|

| Attribute | Description |
|---|---|
| Ignore_Line_End |
Specifies whether or not parse errors dealing with the end of an input line are ignored. For example, Fixed field occurs past end of line or Too few fields. This attribute helps control processing when there are too few data items in an input row.
|
| Ignore_Parse_Errors |
Specifies whether to ignore parse errors during the build.
|
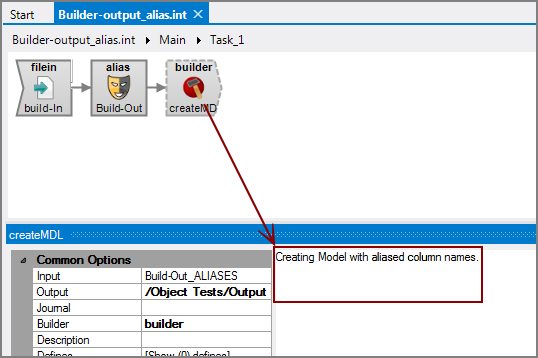
Each object has an area where you can enter comments.
It is a DI best practice to enter a note for every object in a VI script. You can set a VI preference to give a warning for each object without a note.
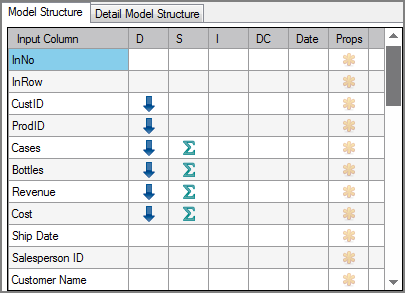
You set attributes for the output model in the ![]() Model Structure column grid.
Model Structure column grid.
For each input column you can indicate the following column properties.
| Attribute | Description |
|---|---|
| Input Column | Displays the name of each input column. This attribute is read-only. |
| D (Dimension) |
Defines the input column to be a dimension in the model output. At least one input column must be defined as a dimension. To define a column as a dimension, click the D column for that row. |
| S (Summary) |
Defines the input column to be a summary column in the model output. To define a column as a summary column, click the S column for that row. |
| I (Info Field) |
Defines the input column to be an info column to a corresponding dimension in the model output. To define a column as an Info Field, click the I column for that row. |
| DC (Dimension Count) | Instructs the build to precalculate the dimension counts (DimCounts) for a dimension. For more information, see Column Properties Dialog Box. |
| Date |
Defines the input column as a date. It is important to identify date columns so that they are stored properly in the model, facilitating ProDiver functions such as sorting, date and time functions, and timeseries. To define a column as a date, click the Date column for that row. For more information, see Column Properties Dialog Box. |
| Props (Column Properties) |
Opens a separate Column Properties dialog box where you can set detailed properties. For more information, see Column Properties Dialog Box. |
The Column Properties dialog box allows you to set detailed properties for dimension, summary, and info field columns prior to building the model.
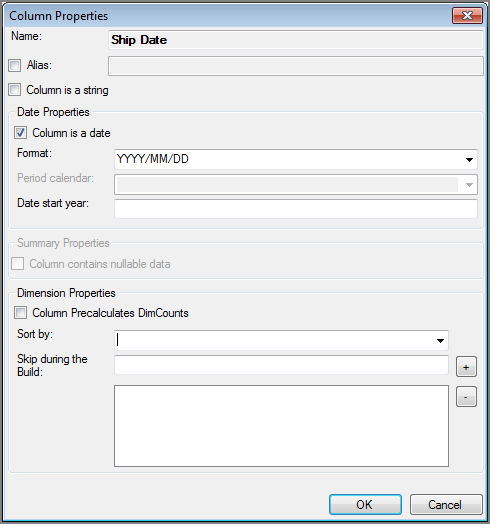
| Attribute | Description |
|---|---|
| Name | Displays the name of the input column |
| Alias | Sets an alias for the individual column. Select the check box and type an alias for the column. Spaces before or after this name are ignored, but spaces within the name are allowed. |
| Column is a string |
Columns with numeric data are considered numeric columns and any leading zeros are stripped off. Select this check box for columns that contain numeric data that should not have any calculations made on it, such as zip codes or part numbers. This attribute preserves leading zeros in the data and allows use of string manipulation functions. |
| Column is a date |
Select this check box to treat the column as a date. This attribute is equivalent to clicking the Date column for an input column in the Model Structure. If selected in the Model Structure, the Column is a date check box is selected and the same in reverse. When creating a model, Builder converts date columns into an internal date format (an integer number). This number represents the count of days since December 31, 1899. This internal format lets ProDiver easily manipulate dates for use in time series, period comparisons, calendar plots, and dimension date roll-up features. This allows ProDiver to sort dates chronologically, by year as well as month and day. For example, 12/10/2011 would come before 10/10/2012, but after 01/01/2011. |
| Format |
If the Column is a date attribute is selected, choose a date format from the list. Any date prior to January 1,1900 displays a Date Out of Range message. Choices include:
|
| Period calendar |
N/A |
| Date start year |
If the Column is a date attribute is selected, use this attribute to specify the beginning date range for handling two-digit years within a 100-year window. This attribute allows the Builder object to correctly interpret two-digit years within the specified range. The Builder object then converts the two-digit years to the appropriate four-digit dates. For example, specifying 1950 indicates a range between 1950 and 2049 such that 79 gets interpreted as 1979 and 14 gets interpreted as 2014. |
| Column contains nullable data |
For columns marked as summaries, select this attribute so that Builder distinguishes between zeros and nulls and keeps a count of the non-null values in the input. Normally, Builder treats null values in input as zeros. This count is used when calculating averages and standard deviations on the field in ProDiver. Setting this attribute slightly increases the size of the resulting model. |
| Column Precalculates DimCounts |
For columns marked as dimensions, select this attribute for Builder to precalculate dimension counts (DimCounts). This attribute is equivalent to selecting the DC column for an input column in the Model Structure. If DC is selected in the Model Structure, the Column Precalculates DimCount check box is checked and the same in reverse. In ProDiver, DimCounts display the number of unique values for all dimensions, based on the selected dimension value. It is a numeric value that displays in the ProDiver console, but it can also be added as a calculated column in a tabular. DimCounts deliver a large amount of information with very little work. However, they are computation-intensive, and can be slow for large data sets with many unique values in the dimension counted. Having Builder precalculate some DimCounts can speed up ProDiver access to DimCounts for non-grouped core dimensions. |
| Sort by |
For columns marked as dimensions, allows you to set up an alternative sort. By default, ProDiver sorts low to high in the following order:
This alternate sort is an internal sort within the model of one column following the default sort of another column. An example of an alternate sort is to sort the dimension parts by part number rather than alphabetically. Select the desired column from the list to change the sort order for the dimension. |
| Skip during the build |
Specify one or more dimension values to skip when summarizing data. When Builder summarizes the data for the dimension value, it uses a large blocking factor. You can optionally specify the Skip_Blocking_factor attribute to reduce the amount of preprocessing Builder does for these data values. However, diving into these values is slower. You should use this option only for dimension values that you do not expect users to dive on.
To remove a dimension, select it in the box and click the minus sign(-) button. |
Use the ![]() Tree Grid to manipulate the output that displays in the ProDiver console.
Tree Grid to manipulate the output that displays in the ProDiver console.
The tree builds as you make selections in the Model Structure section—for example Dimension versus Summary. You can also drag and drop items from the Model Structure section into the Tree Grid. The dimension order in the tree grid is what appears in the ProDiver console.
In the Tree grid you can:
-
Double-click an item to open that column's Column Properties dialog box.
-
Use the
 context menu commands to reorder items or change properties of the tree grid.
A context menu item is available on a Builder output object to convert it to a cBase output object thus allowing quick conversion of older scripts to use the Spectre engine. If the Builder object has any aliases set or uses the Squash attribute, additional objects are added to accommodate these features.
For more information, see Converting Builder Output to cBase Output.
A context menu item is available on a Builder output object to convert it to a Tunnel output object. The extension for the output file is changed from mdl to txt. After this conversion, should you need it, there is a context menu item on the Tunnel object that allows you to convert the Tunnel output object back to a Builder output object. This conversion back to a Builder output object handles all of the Builder attributes and changes the txt file extension back to mdl.


