Builder Description files (dsc) create Dimensional Insight models (mdl) by specifying how to interpret the raw data and organize it into the classic model structure.
This topic describes how to create, edit, and run a Builder Description file in Workbench to create a model.
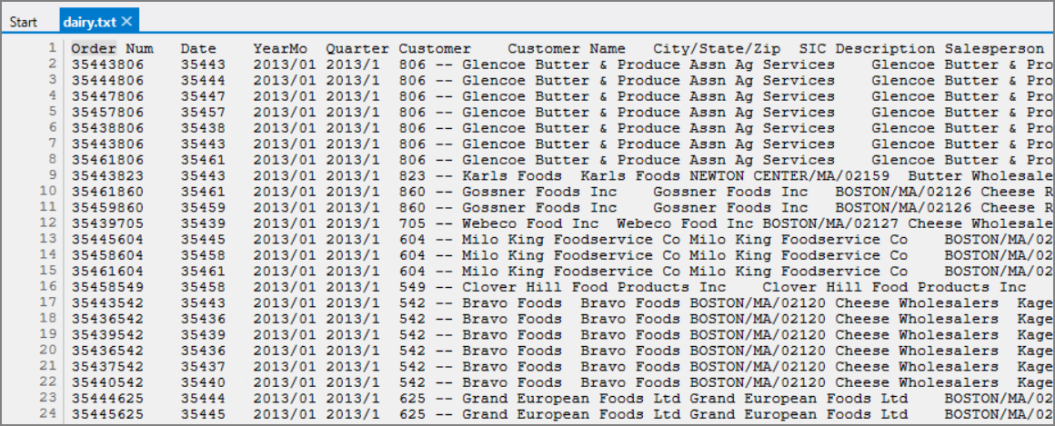
Prerequisite: For this example, the data is in a flat text file. For ![]() example:
example:
-
With your project selected, click File > New > Builder Description File.
-
In the
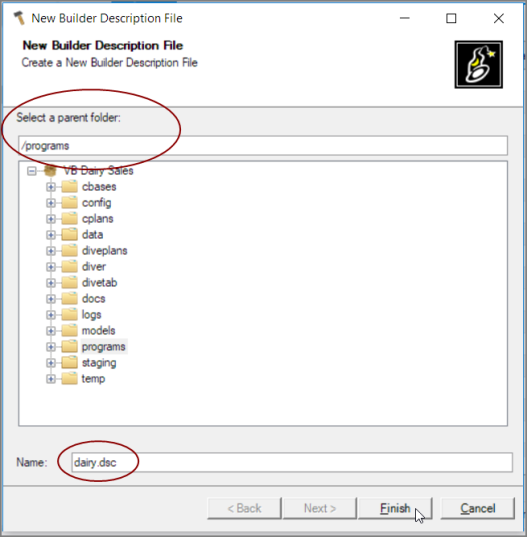
 New Builder Description File dialog box, select a folder and enter a name for the script .
 -
Click Finish.
A Visual Builder tab opens the new Builder Description file with three default objects on the task flow pane, as shown
 here.
here.
NOTE: Alternatively, you can right-click a folder in Workbench Explorer and click New > Builder Description File. The new file opens directly, and focus is set to rename the file in Explorer.
-
Click the Filein object.
NOTE: There is a red bar at the top of the Filein object that indicates a required attribute is missing. Place the mouse over the object for a tooltip about the required attribute, such as filenames / starnames in this example. The blue dashed outline, indicates that the object is selected, which effects what displays in the object properties panes.
-
With the Filein object selected, click the browse button, which is the ellipses, for the Filename(s) or Starname(s) attribute.
-
Navigate to and select the data file in the Select File dialog box.
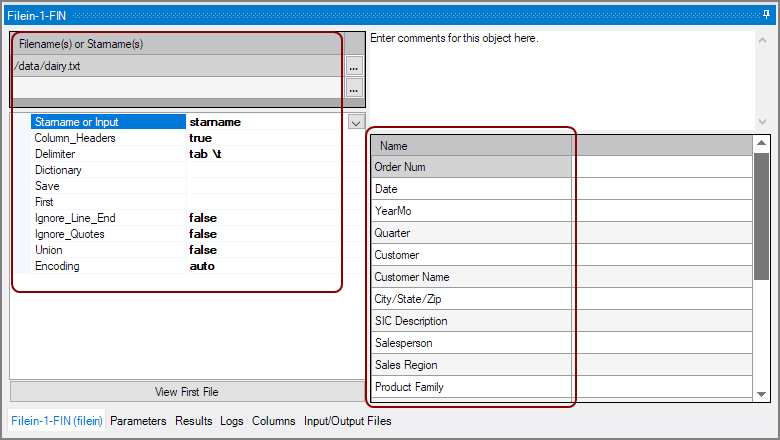
Default attribute values are set and the data columns are listed under Name. For
 example:
NOTE: Prior to 7.1(19), Workbench converts the input tag to a starname tag. This can break scripts. The Starname or Input property available starting with version 7.1(19), allows you to keep the input attribute for single files. This supports use of the -i input override parameter on the command line when calling the classic model builder from a script. For new scripts created after version 7.1(19, the Filein object defaults to input.
See the VI Filein Input Object reference topic for information about the additional Filein attributes you might want to set.
NOTE: The VI Filein object has many more attributes than are available for the classic Builder Filein object.
-
Select the Calc object, which is an optional object.
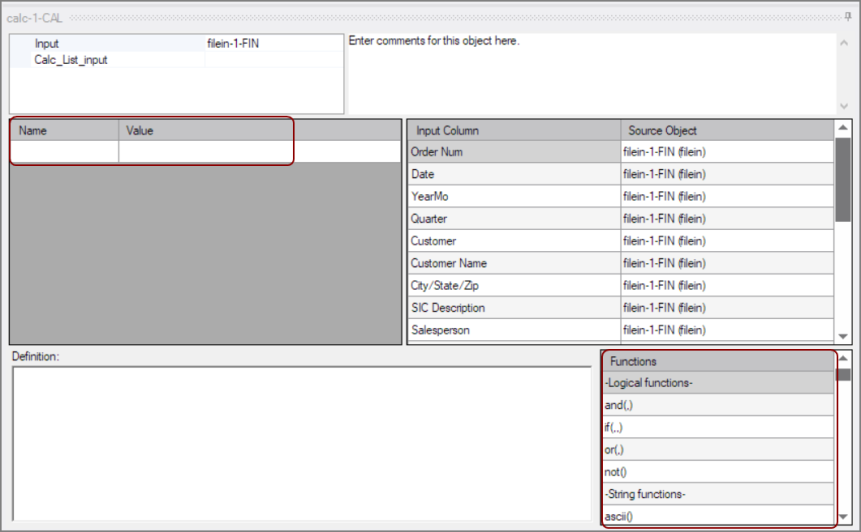
The
 calc object properties pane displays with space to add columns and apply functions.
See the Builder Calculations Overview topic for links to the appropriate Integrator Calc types available.
See the VI Calc Process Object topic for information about the attributes and how to edit them.
NOTE: The VI Calc object has a few attributes that are not available in the classic Builder Calc object.
-
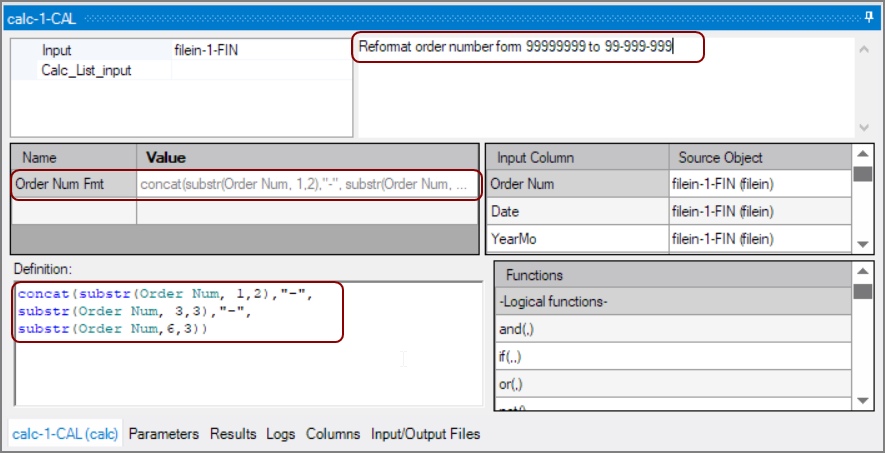
You decide to reformat the order number for easier reading. Add another column with your format. For
 example:
 -
Select the Builder object.
The Builder object properties pane displays.
-
Under the Common Options section of the attributes, select an Output folder by using the browse button and a File Name.
See the VI Builder Output Object topic for information about additional attributes you might want to set in the pane.
-
In the Model Structure tab, select which columns to keep by clicking the appropriate type. Leaving columns unmarked removes them from the resulting model. See Classifying Data for details on the Model Structure elements.
- D—Marks the column as a Dimension
- S—Marks the column as s Summary
- I—Marks the column as an Info Field
- DC—Indicates a DimCount
- Date—Marks the column as a date. To format, use the Props Column Properties options.
- Props—Opens the Column Properties dialog box where you can make additional adjustments such as formatting a date or setting a sort order

- Save the tab.
-
Click Run > Run Script.
The Logs tab opens and displays the build progress. If there are errors, open the build.jou with the text editor to examine the errors.
- When finished, the model opens in ProDiver if your Workbench preference is set to run Diver upon completion of a Builder Description File. See Behavior for Runs in Visual Integrator Preferences. If that preference is not set, right-click the model and click Open with > Diver.
-
Inspect the ProDiver console and data elements to ensure that your model built as expected.
NOTE: You can use DiveMaster to create categories for the ProDiver console. See Dimensions and Categories.
