Typically Production job schedules are initially created in the Overview pane of the open Production script. See Scheduling Production Scripts for more information on setting up initial schedules within a Production script.
The Start Page displays any existing schedules for each open DiveLine connection and allows for additional interactions.
Use the Show toggle list to view either the list of schedules or scripts. You can set which of these views show by default with a Workbench preference (Tools > Preferences > General > Show startpage).
Lists all of the schedules on the server. If a script has multiple schedules, a line for each schedule is present.
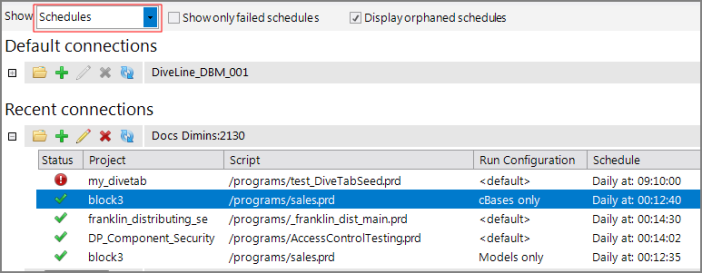
-
Double click on a schedule to open the Show Results view of the Production script.
-
Starting with 7.1(19), when opening a script, the project will be opened as well if it is not yet opened.
- Use the
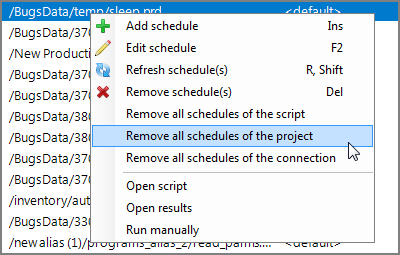
 context menus to perform various related tasks, including opening the script.
Lists all of the scripts on the server that have schedules or have been manually run. If a script has more than one schedule, it only appears once in the list. The Script Overview shows the last run, either by schedule or manual.
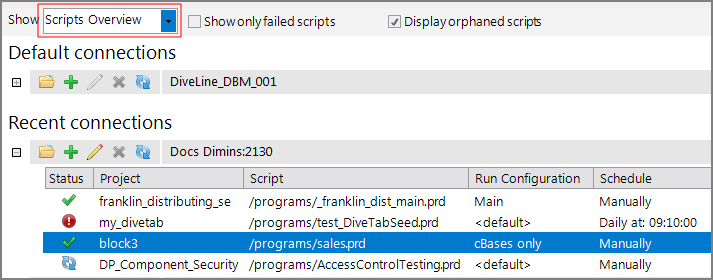
-
Double click on a script to open the Show Results view of the Production script .
-
Starting with 7.1(19), when opening a script, the project will be opened as well if it is not yet opened.
- Use the
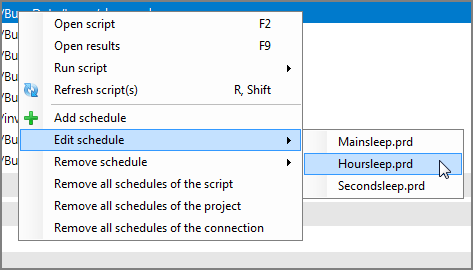
 context menus to perform various tasks, including editing schedules.
Lists all of the schedules on each open DiveLine connection. Use the toggle on the left to expand and collapse the detail table for each server you have connected to.

This consolidated view includes the following for each script:
- Status of the script
- Green check mark for success
- Exclamation point in red circle for failure
- Exclamation point in yellow diamond for warnings
- Blue arrows in circles to allow manual refresh
- NOTE: Warnings are not shown by default. If you wish to see when there are warnings within a Production script, you can set the Workbench preference Show if a schedule has a warning to Yes (Tools > Preferences > Behavior > Content).
- Project name for the scheduled job
- Script location
- Run configuration
- Scheduled details
- Last Run
- Duration
- Started by (Scripts Overview view only)
The detail table gives you a method to open projects as well as create, edit, or delete scheduled jobs using the ![]() buttons above left, for any Production script on each DiveLine.
buttons above left, for any Production script on each DiveLine.
NOTE:
- Both views have context menu commands that allow you to manipulate the selected schedule or script. This includes the ability to open and run the script as well as add, edit, and remove schedules.
- You can toggle the display of failed and orphaned schedules or scripts by using the check boxes at the top of the schedules list.
- An orphaned schedule is a schedule item that launches a Production script that no longer exists because it was deleted.
- You can sort columns by clicking on the headings.
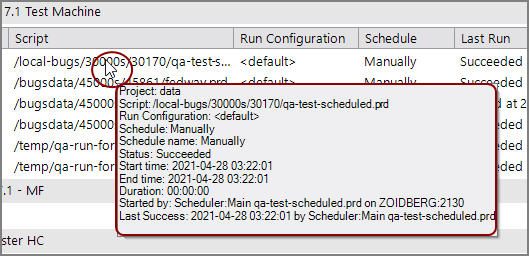
- You can display a
 summary box by placing the cursor over a row.
To add a scheduled job:
- Click Add (green plus sign).
Add behaves in one of two ways:- If a schedule is selected in the table, the Production Job Schedule dialog box displays for that script and you can create an additional scheduled job.
- If no schedule exists or you select at a project level, a Select File dialog box displays that requires you to navigate to the script you want to schedule (note there is a Select Project list at the bottom).
- See Scheduling Production Scripts for details on working with the Production Job Schedule dialog box to set up a schedule.
To edit a scheduled job:
- Select the schedule in the table and click Edit (pencil).
The Production Job Schedule dialog box displays. - See Scheduling Production Scripts for details on working with the Production Job Schedule dialog box to edit the schedule.
NOTE: If one user has a schedule's edit dialog box open, any other user will have read-only access to the Production Job Schedule dialog box and not be allowed to edit.
To delete a scheduled job:
-
Select the schedule in the table and click Delete (red X).
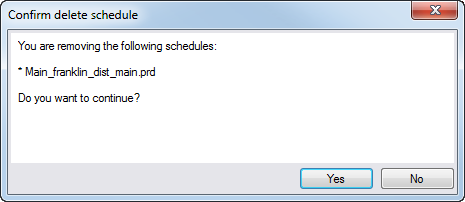
The
 Confirm delete schedule dialog box appears.
 - Click Yes
- The schedule is removed from the script and no longer appears on the Start Page.
To refresh the DiveLine schedules list on the Start Page:
Click Refresh (blue arrows in circle).
