As prerequisites for creating the initial DiveTab module, you must complete the following procedures:
The following items are required to complete this procedure:
- Banner graphic—Rectangular image for use as the top of the main DiveTab screen
- Button graphic—Square image for use as a DiveTab button
- Document—Any pdf, Word, or text document
NOTE: Graphic files are usually placed in the /divetab/images folder, and various document types in the /divetab/documents folder.
For guidance on graphics files and how to bring files into the project, see:
To create the initial DiveTab Module:
-
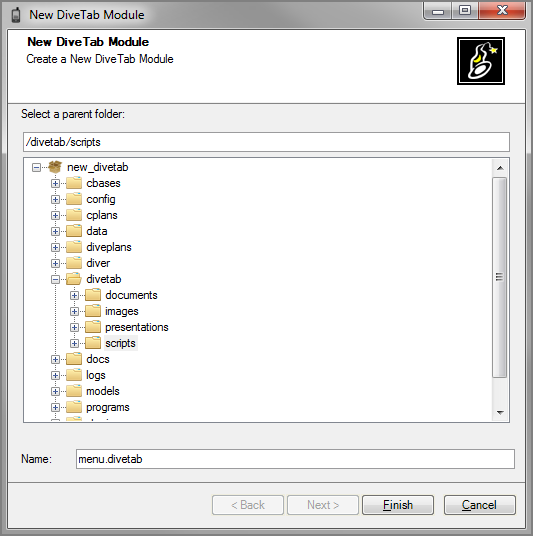
Select File > New > DiveTab Module.
The
 New DiveTab Module dialog box displays.
 -
Select the parent folder, type a Name for the script (for example, menu.divetab), and click Finish.
The
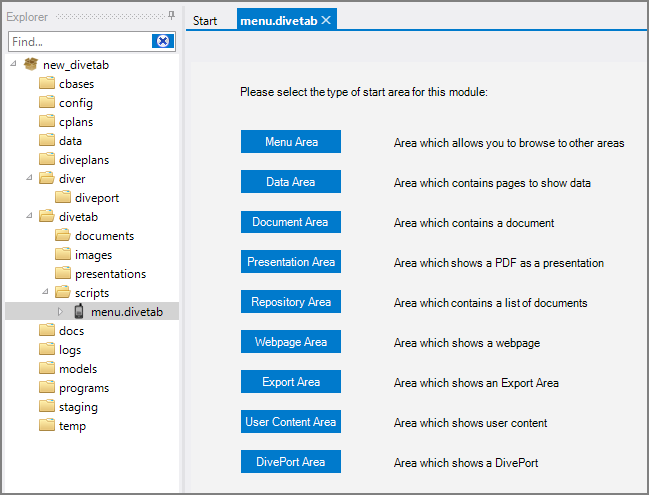
 main edit pane for the new DiveTab module is presented.
NOTE: This view is only presented when you are creating a new DiveTab script.
-
Click Menu Area.
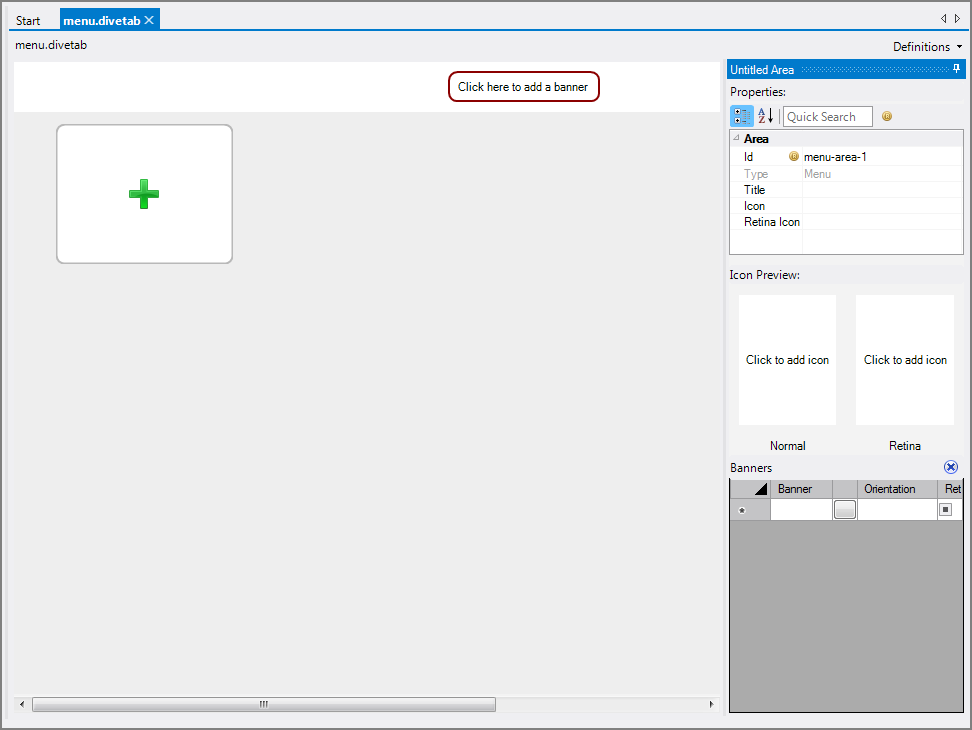
The DiveTab script tab changes to a
 preview pane.
 -
Click the Click here to add a banner area.
A
 Select File dialog box displays.
NOTE: Choosing an icon or a banner is optional, but it improves your testing experience.
-
Navigate to your banner images (likely in the /divetab/images folder), choose your graphic, and click Select.
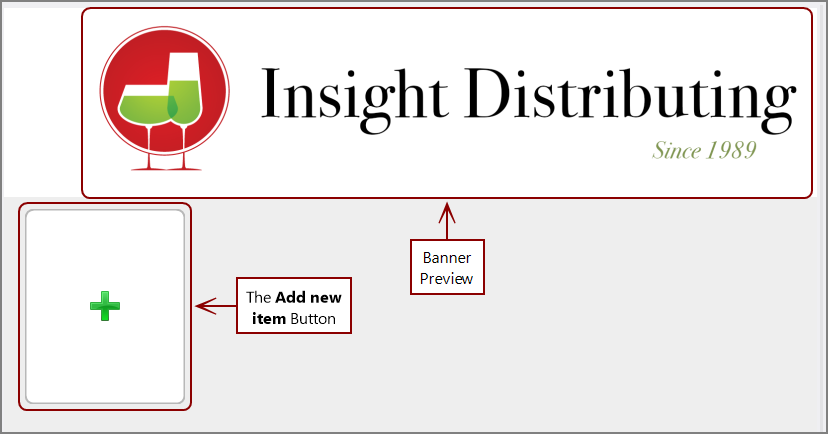
The banner displays in the
 preview pane.
NOTE: You can also drag the graphic file from Workbench Explorer to the banner area in the preview pane.
-
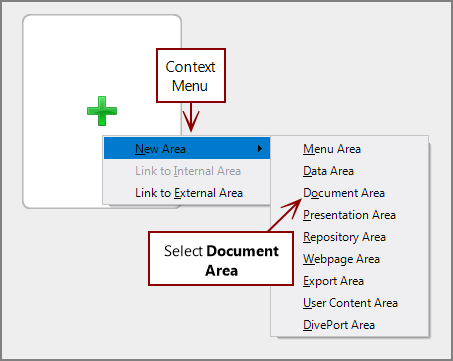
Click the Add new item button (the button containing the green plus sign), and on the context menu, select
 New Area > Document Area.
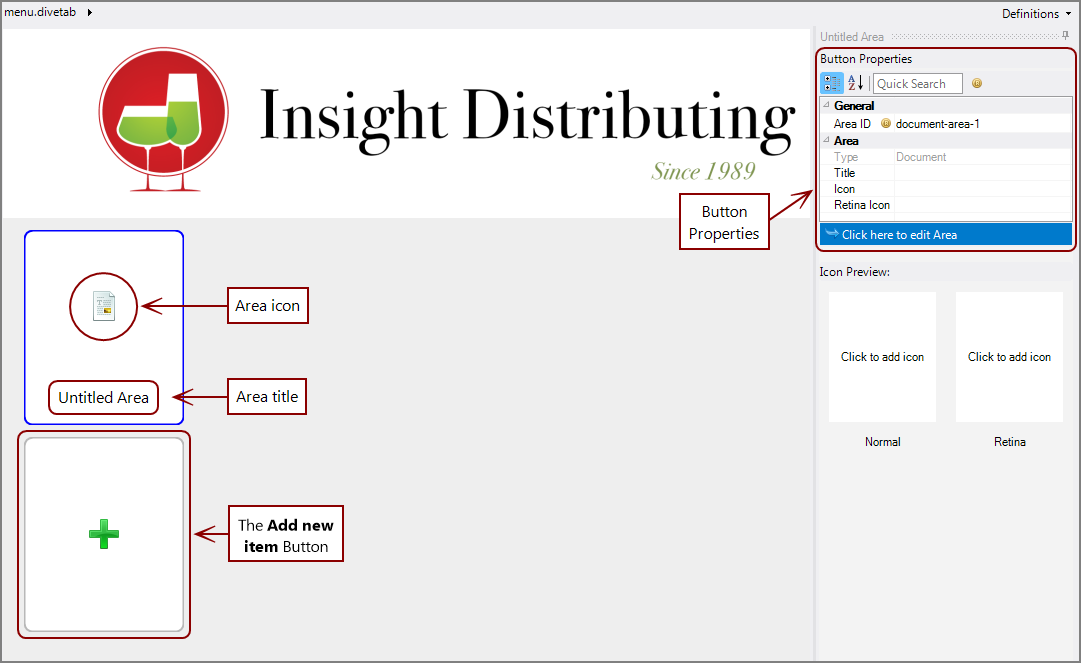
The button changes to show an
 area icon and a title (Untitled Area), both of which you change in the next steps. Also, note that a new button with the green plus sign appears (in preparation for creating additional area buttons).
 -
Notice the
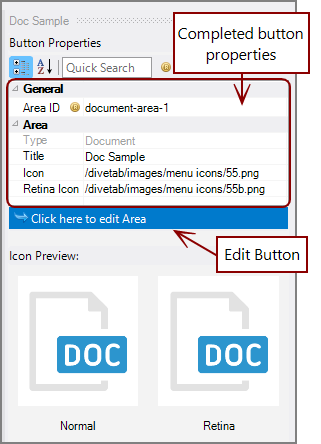
 Button Properties section on the right.
NOTE: You might need to click the button if the focus changes to another button or you navigate away and return.
- In the Area section, click the Title box and type a title for the button (for example, Doc Sample).
-
Click the Icon box, and browse for the appropriate graphic file.
NOTE: Alternatively, you can drag a graphic file to this area from Workbench Explorer.
- Repeat Step b for the Retina Icon box.
-
Click Click here to edit Area (at the bottom of the Button Properties).
The tab changes to display the document preview. but because no document is associated with the button, the preview displays an error message.
-
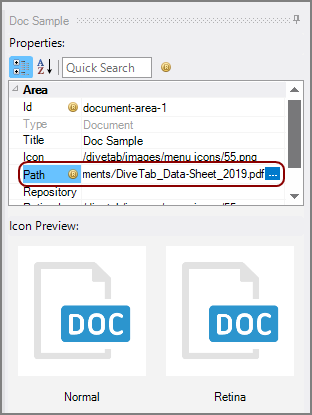
Under Properties on the right, select
 Path, and browse to the document file.
 -
Save the DiveTab module.
You now have a DiveTab module to use in completing the DiveTab configuration and testing.
See Configuring DiveTab on the Server.
