The Visual Integrator (VI) Rotate process object rotates multiple input data columns into multiple rows in the output flow.
![]()
The Rotate object uses two new columns:
- Horizontal column—Holds a string that identifies the column that the row represents.
- Value columns—Holds the corresponding input value for the column. There can be one or more value columns.
These new generated value columns become available as summary output columns in the data flow.
The Rotate object creates multiple output rows—one for each column—for each input row. For example, three columns with three rows of data become nine rows of data in the output flow. The rotated columns do not appear in the output flow.
The Rotate process object has ![]() three panes where you set attributes.
three panes where you set attributes.
You set attributes for the Rotate process object in the ![]() object attributes pane.
object attributes pane.
| Attribute | Description |
|---|---|
| Input |
Defines the object from which the data flow arrives. Use one of the following methods to attach the Rotate object to an input data flow object:
|
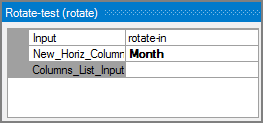
| New_Horiz_Column |
Defines the new horizontal column, which contains the name of the new column (dimension) that the input row represents. The value that you enter here automatically populates the |
| Columns_List_Input |
Defines a separate input flow that specifies the horizontal values and horizontal columns to rotate. This is an alternative method to supply these attributes instead of using the column grid. This input flow must have the following columns:
The Columns_List_Input and the column grid are mutually exclusive. This input flow might be generated with another input object or Calc process object. DI recommends that you generate this input flow with a separate task. |
Each object has an area where you can enter comments.
It is a DI best practice to enter a note for every object in a VI script. You can set a VI preference to give a warning for each object without a note.
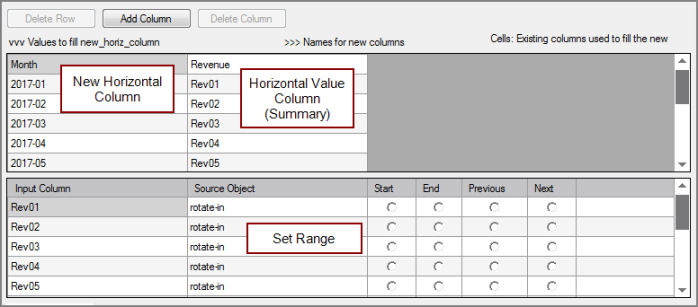
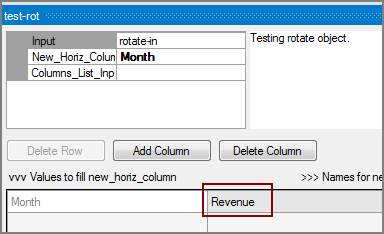
The ![]() Rotate column grid sets the new horizontal column and one or more summary value columns to rotate in the top section. Alternatively, you can define a range to rotate in the bottom section.
Rotate column grid sets the new horizontal column and one or more summary value columns to rotate in the top section. Alternatively, you can define a range to rotate in the bottom section.
| Attribute | Description |
|---|---|
| Column Grid Buttons | Use the Add Column button to add additional value columns. At least one column is required and is provided with the heading new value column. Click twice in the field, and choose a column from the list. With the Delete Row and Delete Column buttons, you can edit the rows and columns that display in the top portion of the column grid. |
| Input Column | Displays the name of each input column. This attribute is read-only. |
| Source Object |
View the name for the source object. Double-click the Source Object for a column to change the task flow focus to that object. |
| Start | Defines the name of the first horizontal column in a range. If defined, the end of the range must be defined using either the End or Next attribute. This attribute conflicts with the Previous attribute and the horizontal columns attributes. |
| End | Defines the name of the last horizontal column in a range. If defined, the start of the range must be defined using either the Previous or Start attribute. This attribute conflicts with the Next attribute and the horizontal columns attributes. |
| Previous | Defines the column before the first horizontal column in a range. If defined, the end of the range must be defined using either the End or Next attribute. This attribute conflicts with the Start attribute and the horizontal columns attributes. |
| Next | Defines the column after the last horizontal column in a range. If defined, the start of the range must be defined using either the Previous or Start attributes. This attribute conflicts with the End attribute and the horizontal columns attributes. |
You can either rotate data by defining horizontal columns and values or by defining a range.
With the following ![]() input data:
input data:
-
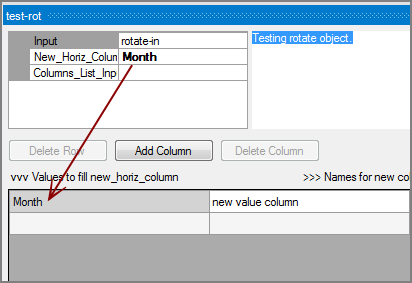
Set the Rotate object's New_Horiz_Column name attribute. For example,
 Month. Note that this name populates the header for the new_horiz_column in the top section of the column grid.
-
In the top section of the column grid, replace the new value column header with a name for the values column. For example,
 Revenue.
 -
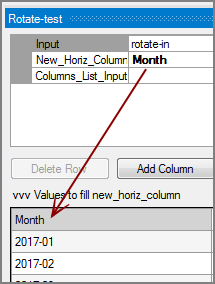
Enter values for the new_horiz_column column. For the month example,
 2017-01 through 2017-12. A new row is added to the table after you enter each value.
 -
Click in each cell for the new value column (that is Names for new columns) and use the drop-down arrow to choose the appropriate item to associate with the row. For example,
 Rev01 with 2017-01.
 Repeat for each row.
-
If rotating additional columns, click Add Column, supply a header, and choose values.
-
Save the tab.
-
Right-click the Rotate object, and click Test Object.
In the
 results you see the rotated data.
With the following ![]() input data:
input data:
-
Set the New_Horiz_Column name attribute. For example,
 Month. Note that this name populates the header for the new_horiz_column in the top section of the column grid.
 -
In the top section of the column grid, replace the new value column header with a name for the values column. For example,
 Revenue.
Do not enter values for the new_horiz-column column.
-
In the bottom section of the column grid, choose a range of columns to rotate. For example,
 Rev01 through Rev03.
 -
Save the tab.
-
Right-click the Rotate object and click Test Object.
In the
 results you see only the columns within the range rotate. All other columns do not rotate.
NOTE: The Start and End attributes are inclusive. The Previous and Next attributes are not inclusive.
Mentioned in:



.png)


.png)

