A group is a collection of users that share similar access requirements. Using groups simplifies managing access to projects and data. If a user belongs to groups that have differing access to a resource, the user's access is determined by a union of each group's access settings.
Groups are managed through the
Prerequisite: To manage groups on a DiveLine connection, you must open a connection to the DiveLine server. For information about opening a connection, see Opening and Closing Connections.
To manage groups:
- Open the DiveLine connection.
- Choose Tools > Server Settings.
- In the Server Settings tab, click the
 Groups tab.
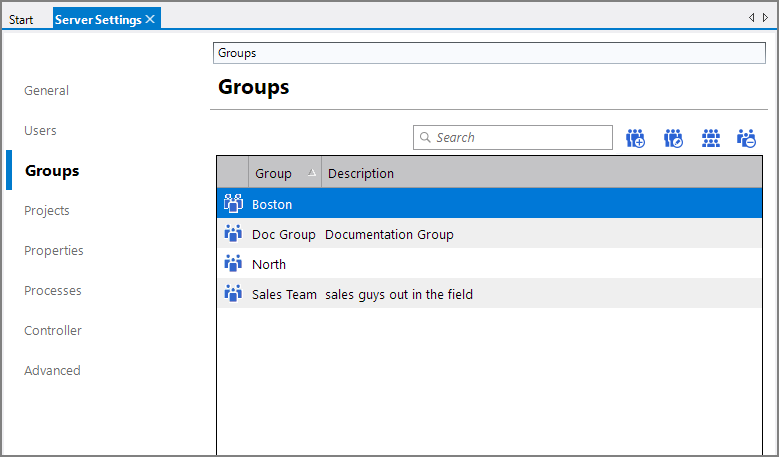
A list of the current groups on this DiveLine connection displays.
The ![]() command buttons to add, edit, copy, and delete groups are at the upper right of the group list above the column headings. If you have a large number of groups, you can use the search box, to the left of the command buttons, to filter the number of groups that display. The search looks for the text in three columns of the groups table (Group name, Description, and Owner) and limits the display to groups that match the characters typed.
command buttons to add, edit, copy, and delete groups are at the upper right of the group list above the column headings. If you have a large number of groups, you can use the search box, to the left of the command buttons, to filter the number of groups that display. The search looks for the text in three columns of the groups table (Group name, Description, and Owner) and limits the display to groups that match the characters typed.
To filter the group list:
-
Enter text in the Search box.
The search filters the list based on the characters entered.
-
Use the command buttons to process the selected group.
To add a group:
-
Click Add Group on the Groups tab.
The
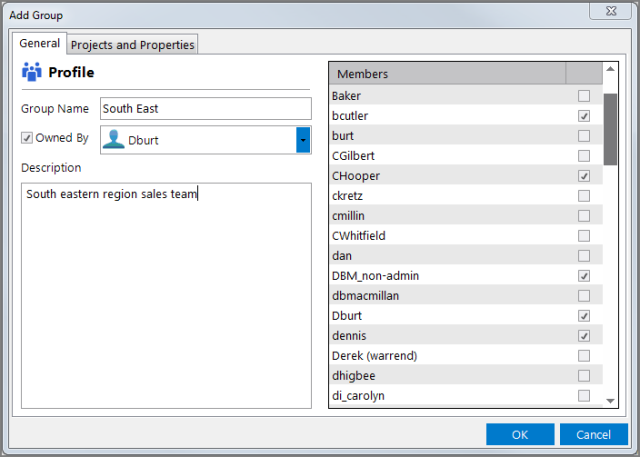
 Add Group dialog box opens.
 -
Supply the following information:
- Enter a name for the group.
-
Click the Owned By check box, and replace the <Enter User/Group> text with the name of a user or group. As you type, available names are suggested.
-
Add a description in the Description box.
-
Select the check box next to each user in the Members list that you want as a member of this group.
-
Click the
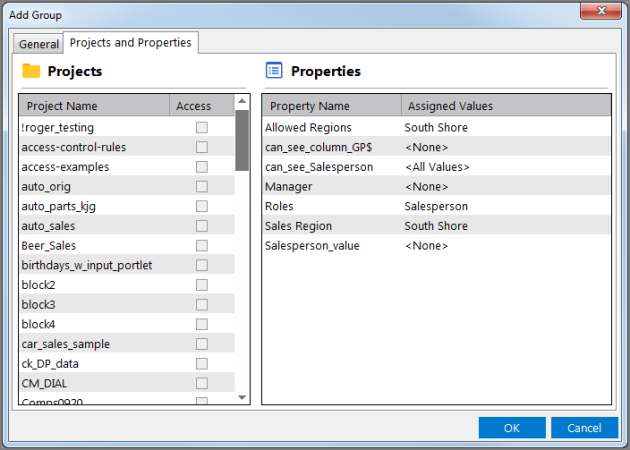
 Project and Properties tab:
 -
Select the check box for each project that this group can access.
-
Assign properties and property values for this group.
See also Assigning Properties to Users and Groups.
-
-
Click OK.
After the group is created, you can edit the group and adjust profile information, change memberships, set project access, and assign properties.
-
Save the tab.
To edit a group:
-
Select the group in the Groups tab.
-
Click Edit Group. Alternatively, you can double-click the group.
The group tab opens.
-
Make edits as required in the General and Projects and Properties tabs.
-
General tab—Edit the group owner, description, and members.
Projects and Properties tab—Edit project access and assignment of properties and values.
-
-
Save the tab.
You can copy a group to create a new group with the same settings, which you then can adjust as needed.
To copy a group:
-
From the Groups tab, select a group in the group list.
-
Click Copy Group.
The Copy Group dialog box opens.
-
Provide a unique name (required) and make adjustments to any other Profile details, including selections in the Members list.
You can make adjustments on the Projects and Properties tab as required.
-
Click OK.
The group is created.
-
Save the tab.
NOTE: Deleting a group removes any resource access group members had through this group membership.
To delete a group:
- Select a group in the Groups tab.
- Click Delete Group.
- Click Yes in the Delete Group confirmation dialog box.
- Save the tab.
For more information about project access and assigning properties and values to groups, see Enabling Project Access and Assigning Properties to Users and Groups.


