Resolving Conflicts
When multiple users are working in the same project file, Git conflicts might occur. Git conflicts transpire when another user commits changes to a file that you are working on before you commit your changes. If your changes clash with the other user's changes, you must view the differences between their commit and your changes and determine which changes to keep. You can either override their changes, discard your changes, or manually merge the two changes into one unified file. Workbench provides a GUI to view and resolve these conflicts.
The Git conflict resolution GUI allows you to see each file that has a conflict, and view the differences between that file and the external file it is in conflict with. To view the conflicts between files:
-
Click Tools > Version Control > Commit to ensure that your changes are saved and compared to any files on the Git server.
-
Click Tools > Version Control > Pull or Fetch from Remote.
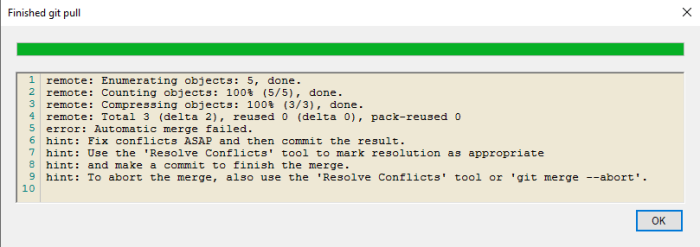
If a conflict exists, the Finished git pull window shows text similar to the following:
-
When conflicts exist click Tools > Version Control > Resolve conflicts.
The
 Resolve Conflicts window opens.
 -
Double-click the name of the file you want to view.
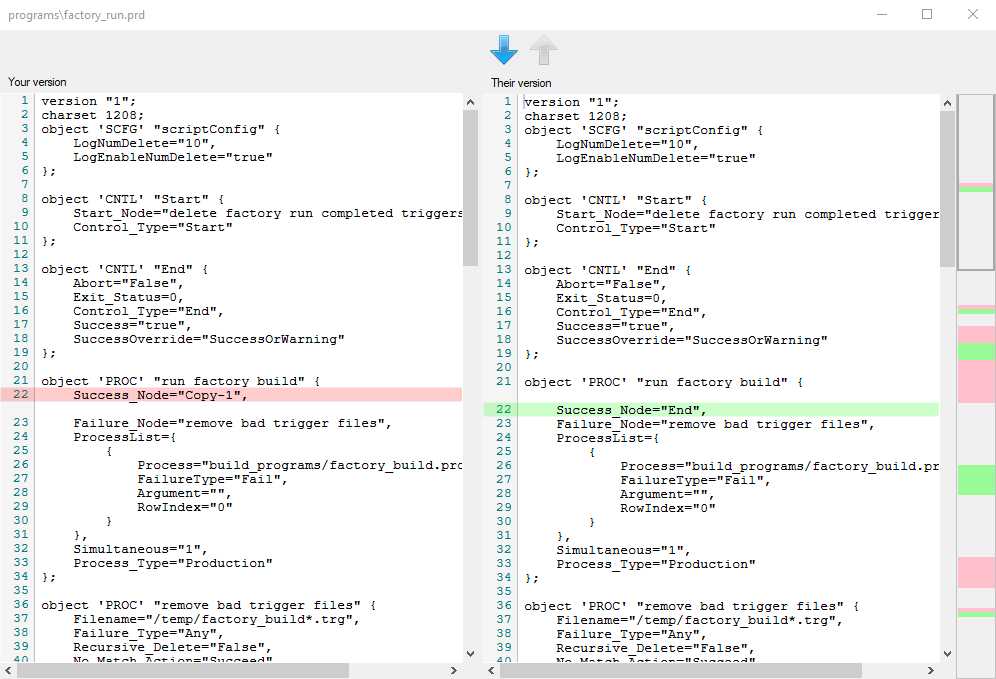
The
 difference comparison window opens.
 -
You can click the down and up arrows to navigate through the list of differences between your file and the external file. The differences are highlighted.
The Git conflict resolution GUI has multiple ways to resolve conflicts. To access each option and commit the resolution:
-
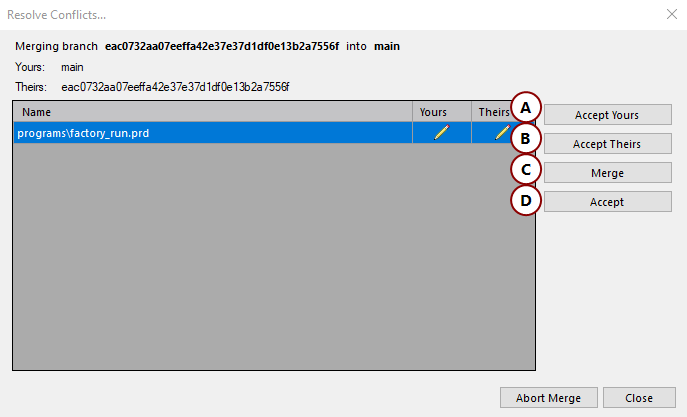
There are four ways to resolve conflicts on the Resolve Conflicts window:
-
Accept Yours—This option discards any changes made outside of your instance of Workbench and accepts your changes.
-
Accept Theirs—This option discards your changes and accepts the changes made by the other user.
-
Merge—This option opens both versions of the conflicted files and allows you to manually choose which changes to keep or discard. See the Merging section for more details.
-
Accept—This option accepts any changes made to the conflicted file. If no merging is done, the external changes are appended to your changes.
-
-
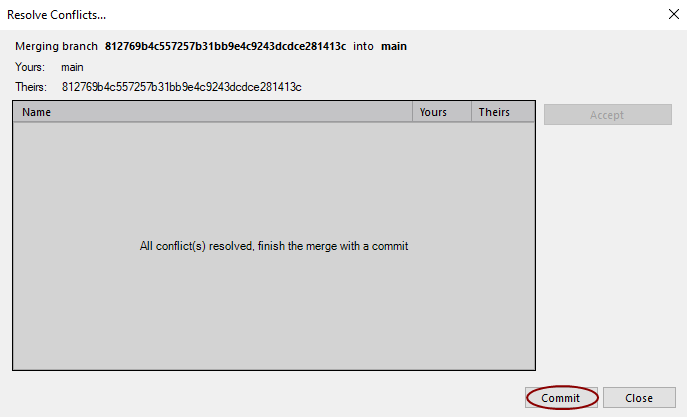
When all conflicts are resolved, the
 Resolve Conflicts menu displays the Commit option.
 -
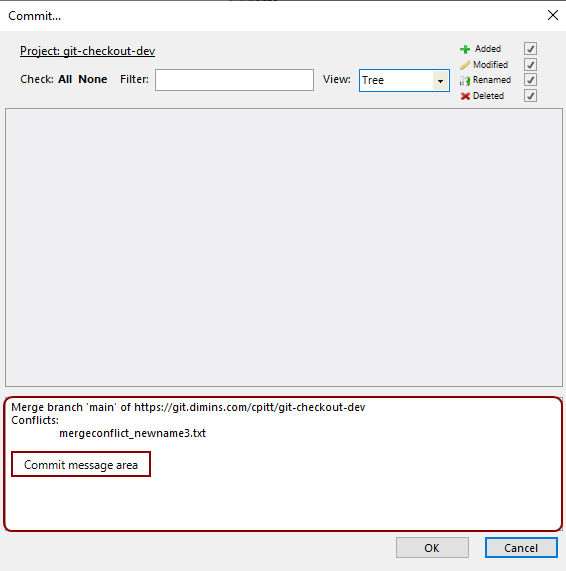
Click Commit to open the Commit window.
The commit window lists the files being committed in the
 Commit message area.
 -
Click OK to finish the commit.
The Git conflict resolution GUI allows you to manually merge conflicted files by editing your local file in a side-by-side view with the external file it is in conflict with. To manually merge the files:
-
Click the Merge option in the Resolve Conflicts... menu.
The
 Merge Instructions window opens.
NOTE: If you select Do not show again, you can see the merge instruction dialog box again as described in Setting Workbench Preferences.
-
Click OK.
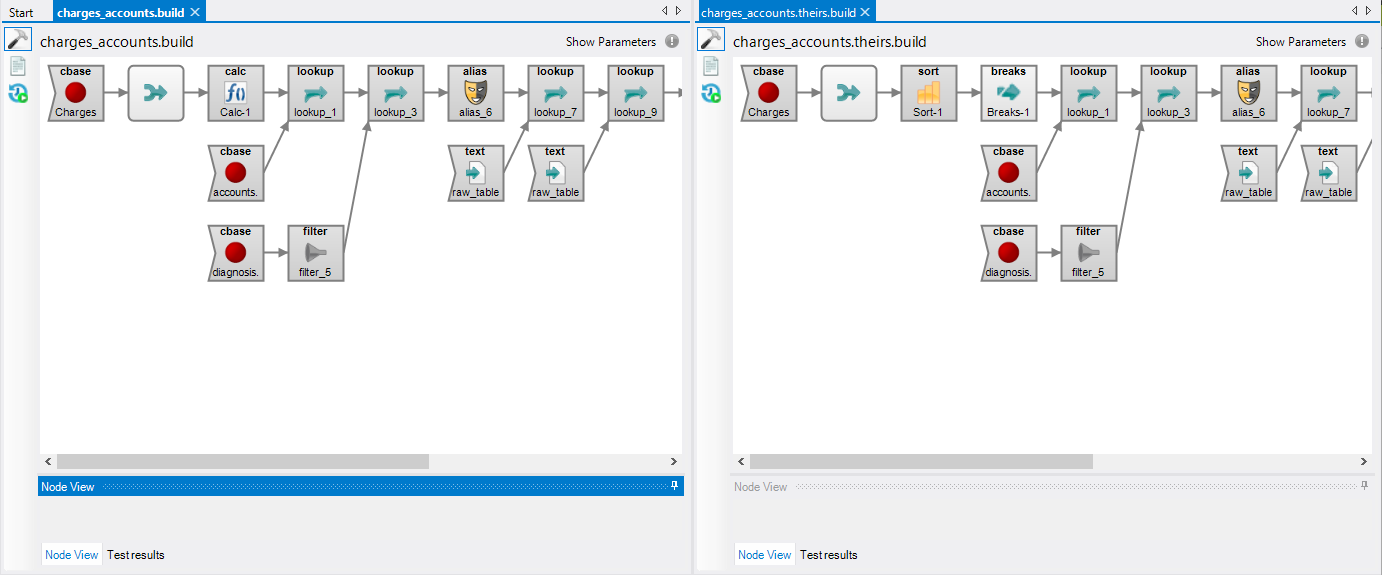
The
 text editor loads with your version of changes on the left and the external changes on the right. The version of the file on the right is a temporary file, and is automatically deleted when the Git conflict is accepted.
 -
After you make your changes, click Accept in the Resolve Conflicts menu to finalize your merge.

