Because there are many dependencies across the platform components based on the project path, Workbench does not have a direct option to rename a project. However, you can effectively rename a project by uninstalling the project, leaving the project contents on the server, and then creating a new project that points to the contents of the original project.
IMPORTANT: DI does not recommend renaming Workbench projects. If you decide to use this procedure to rename a Workbench project, proceed with caution and be prepared for additional configuration requirements.
- If you are early on in the process of creating a Workbench project, you can rename it with this work around. However, if you have client-side ties to the project, such as ProDiver, DivePort, and DIAL, already in place, you should be aware that additional steps might be required to change project name references by those applications to ensure that they find the project content.
- If you use this procedure to rename a Workbench project, you must also reset any aliases and all user access control settings.
If you wish to rename a project, use this procedure:
-
Select the project in the project listing (Tools > Server Settings > Projects) and click Uninstall Project from the buttons on the top right.
-
In the
 Uninstall Project dialog box, leave Delete Project Contents unchecked, and click Yes.
 For more information about uninstalling projects, see Uninstalling Projects.
-
The project is removed from the project listing, but the files and folders remain on the server.
-
Create a new project with the name that you want, and in the
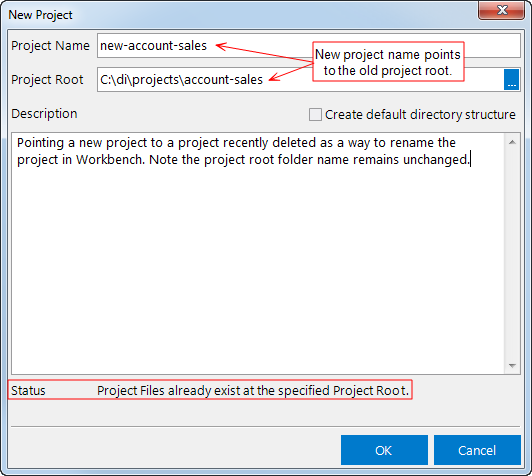
 New Project dialog box, browse to the previous project's Project Root folder.
 For detailed steps to create a project, see Creating a New Project.
NOTE: The Status area on the bottom informs you that project files exist in this location. This means that those files and folders will be used to create the new project.
-
Click OK.
A new project is created with the contents of the previously deleted project.
NOTE:
- The project root folder retains the original folder name and the project name and folder name no longer match. The best practice is to have the project name match the project's root folder. If you have network access to the server, you can rename that project's root folder between steps 3 and 4.
- To reset the project root, see Spectre project Options.
-
Reset any aliases and user access control settings, as well as ensure that any effected client applications, such as ProDiver, DivePort, and DIAL, are aware of the project name change.

