Adding a Stamp Portlet
DivePort administrators with a Measure Factory license can add standard stamps delivered with the software, as well as customized stamps defined in Workbench.
TIP: Available options depend on the configuration of the chosen stamp type.
Administrators
- In DivePort, browse to the page where you want to add the portlet.
-
On the DivePort toolbar, click Edit to unlock the page and enable edit mode.
The Edit menu item is replaced with edit tools, including a page context menu chevron.
- On the toolbar, click the chevron.
- On the page context menu, click Add a Portlet.
-
On the Add Portlet page, under Measure Factory, double-click Stamp.
The Edit Stamp Portlet wizard opens.
-
If necessary, double-click a Measure Factory project.
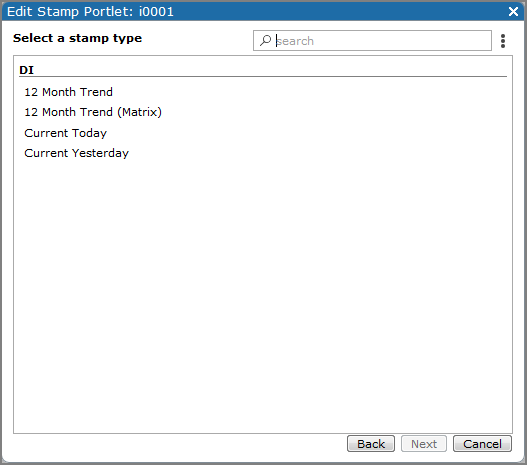
The wizard advances to the Select a stamp type page, which lists the available stamps for your project.

-
Double-click the stamp that you want to use.
The Select a value page opens.
- If prompted, select one or more dimensions to apply to the stamp, and then click Next.
-
If prompted, select one or more measure values to apply to the stamp, and then click Next.
A summary page displays.
-
Verify the settings, and then click OK.
The stamp portlet is added to the page.
- On the menu bar, click Save to save the portlet and exit edit mode.
NOTES:
-
The size and layout of the stamp portlet are defined in the stamp template file.
-
Each stamp is assigned a unique action group by default. If you want stamps to interact via click actions such as crosslinks, edit or remove the
 action group setting.
For more information, see What Is an Action Group? and Portlet Instance Settings.
If you as the portal administrator enable self service user pages and specify a default factory project in the environment settings, and then install customized stamps with self-service enabled, users can access their Self Service page to add and edit stamp portlets using specified measures and filters.

DivePort does not ship with any self-service-compatible stamps by default. In Workbench, you must specify which customized stamps are available for self service users in your DivePort instance. Self service stamps must have one measure only. They cannot have dimensions or options.
To add stamps to their Self Service page, users can take the following steps:
-
Browse to the self service page.
-
On the upper-right corner of the page, click the Edit icon.

A two-tab pane opens on the left side of the page, listing the available Measures and Filters (dimension QuickViews).
-
On the Measures tab, select the measure to use for the dashboard.
A measure definition and Select a stamp for your page list appears.
-
Double-click the stamp template to use.
The stamp dashboard is added to the page.
-
To add QuickViews to the page, click the Filters tab, and then select the dimensions and other options to use for QuickViews.
Depending on what is available in the factory data, options can include:
Category Option Type Date Range Modifiers Calendar Configurable Date Settings Current Date Dates Time Range Configurable Date Settings NOTE: Available time ranges are defined in the default Factory.
-
To save the page, on the upper-right corner of the page, click the Save icon.

Watch the Video: Adding a Stamp Portlet.
