When an input table is created, the ![]() default access is set to Privileged Access for named users, and No Access for guest users. However, if the input table contains metadata, you can configure additional access controls based on those columns.
default access is set to Privileged Access for named users, and No Access for guest users. However, if the input table contains metadata, you can configure additional access controls based on those columns.
You can assign privileged access to unprivileged users or groups, to the entire table, or to sections of the table based on specific column values. For example, you can give a user privileged access to all rows that have a State attribute set to NY.
- On the DivePort title bar, click ADMIN > Input Tables.
-
On the Input Tables list, click the Edit this input table chevron for the Input Table that you want to allow access to, and then click Access.
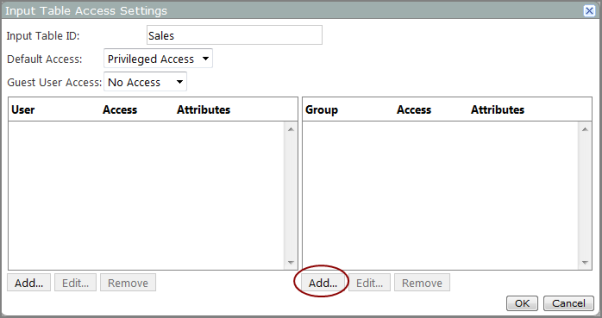
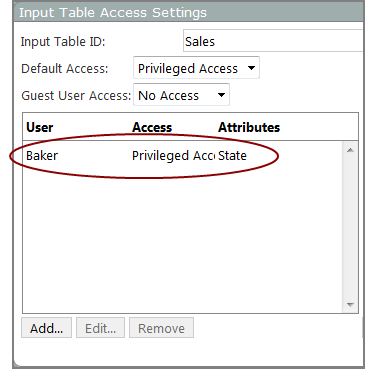
The Input Table Access Settings
 dialog box opens.
 -
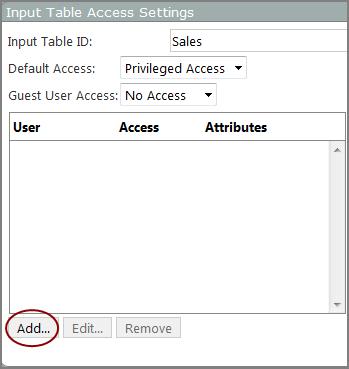
Under the User Access
 box, click Add.
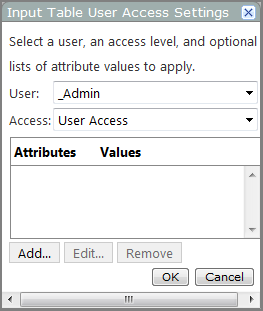
 The Input Table User Access Settings
 dialog box opens.
 - From the User list, select the user that you want to provide access to.
- From the Access list, select Privileged Access.
-
Do one of the following:
- If you want the user to have access to the entire input table, click OK, and then proceed to step 10.
- If you want the user to have access to rows with a specific attribute value, click Add.
-
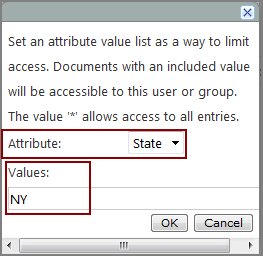
Select the attribute that you want to specify.
NOTE: In this
 example, the user is granted access to rows that have the State attribute value (column) set to NY.
 - Enter one or more comma-separated Values, and then click OK.
- If you want to specify another attribute, click Add, and then repeat steps 7 and 8.
-
Click OK to close the Input Table User Settings dialog box.
The user is added to the User Access
 list.
list. - Click OK to close the Input Table Access Settings dialog box.
- On the DivePort title bar, click ADMIN > Input Tables.
-
On the Input Tables list, click the Edit this input table chevron for the Input Table that you want to allow access to, and then click Access.
The Input Table Access Settings
 dialog box opens.
 -
Under the Group Access box, click Add.
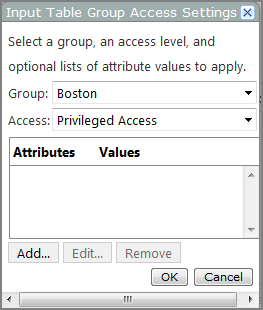
The Input Table Group Access Settings
 dialog box opens.
 - From the Group list, select the group that you want to provide access to.
- From the Access list, select an access level.
-
Do one of the following:
- If you want the group to have access to the entire input table, click OK, and then proceed to step 10.
- If you want the group to have access to rows with a specific attribute value, click Add.
-
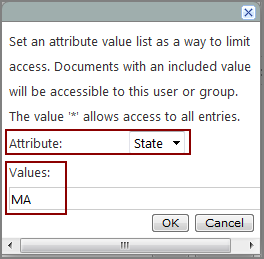
Select the attribute that you want to specify.
NOTE: In this
 example, the group is granted access to rows that have the State attribute value (column) set to MA.
 - Enter one or more comma-separated values for the attribute, and then click OK.
- If you want to specify another attribute, click Add, and then repeat steps 7 and 8.
-
Click OK to close the Input Table Group Settings dialog box.
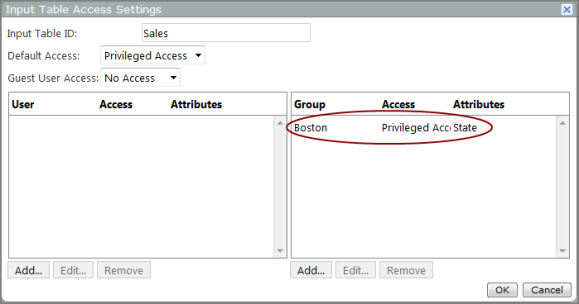
The group is added to the Group Access
 list.
list. - Click OK to close the Input Table Access Settings dialog box.
- On the DivePort title bar, select ADMIN > Input Tables.
-
On the Input Tables list, select the Edit this input table chevron for the Input Table that you want to grant access to, and then on the context menu, select Access.
The Input Table Access Settings dialog box opens.
-
In the Guest User Access box, select one of the following options:
-
To allow guest users to read the contents of the input table vial a table editor portlet, select User Access.
-
To allow guest users to add new rows to the table by using a form portlet or by using a Create Table Row click action, select Privileged Access.
NOTE: Guest users with privileged access cannot read or edit existing rows in the table.
-
-
Click OK to close the Input Table Access Settings dialog box.
TIP: If you use a form portlet for data validation, be sure to set the access permission on the underlying lookup tables to User Access.

