Adding an Export to Excel Click Action
NOTE:
To add a click action that displays the current data in an Excel spreadsheet:
-
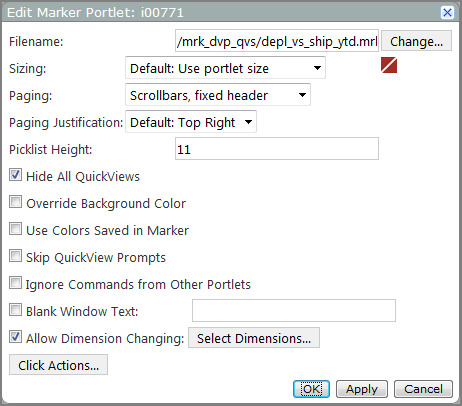
Open the Edit <Portlet type> Portlet
 dialog box.
  Remind me how.
- Browse to the page that contains the portlet that you want to edit.
-
On the DivePort toolbar, click Edit to unlock the page and enable edit mode.
- Right-click the portlet that you want to edit, and then on the context menu, click Edit.
-
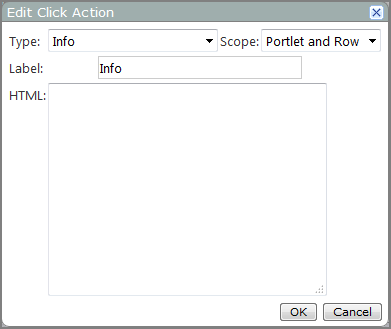
The Edit Click Actions
 dialog box opens.
 -
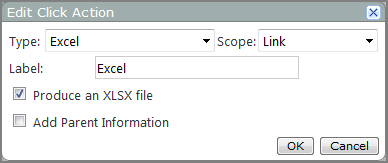
In the Type box, select Excel.
The Edit Click Action
 dialog box shows options for the Excel click action.
 -
In the Scope box, select the area in the portlet that you want the user to click to trigger the click action.
- Select Link if you want an Excel logo to appear at the bottom of the portlet instance.
- Select Page and Row if you want the click action to be available anywhere on the portlet instance.
-
In the Label box, enter the label that you want to appear in the click action context menu.
-
Select Produce an XLSX file if you want the Excel spreadsheet to display in xlsx format. Clear this check box if you want to use xls format.
NOTE: Excel xls worksheets are limited to approximately 65500 rows. If your portlet has more than 65500 rows, be sure to select this option because the xlsx format does not have this limitation.
-
If your are adding the click action to a marker portlet, you can select Add Parent Information to include the dive path in the Excel file.
-
Click OK.
The Excel click action is added to the Click Action list.
-
If this is the only click action on the list, and you want the spreadsheet to display immediately when the click action is triggered, select Skip the menu when there is only one action.
-
Click OK to close the Click Actions dialog box.
-
Click OK to close the Edit Portlet dialog box.
-
On the toolbar, click Save to exit edit mode and lock the page.
-
Open the Edit <Portlet type> Portlet
 dialog box.
  Remind me how.
- Browse to the page that contains the portlet that you want to edit.
-
On the DivePort toolbar, click Edit to unlock the page and enable edit mode.
- Right-click the portlet that you want to edit, and then on the context menu, click Edit.
-
Click Click Actions.
The Click Actions
 dialog box opens.
 -
Click Add.
The Edit Click Action
 dialog box opens.
 -
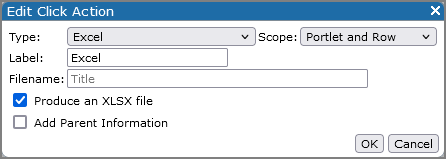
In the Type box, select Excel.
The Edit Click Action
 dialog box displays Excel click action options.
 -
In the Scope box, select the area in the portlet that you want the user to click to trigger the click action.
- Select Link if you want an Excel logo to appear at the bottom of the portlet instance.
- Select Page and Row if you want the click action to be available anywhere on the portlet instance.
- In the Label box, enter the label that you want to appear in the click action menu.
-
Select Produce an XLSX file if you want the Excel spreadsheet to display in xlsx format. Clear this check box if you want to use xls format.
NOTE: Excel xls worksheets are limited to approximately 65500 rows. If your portlet has more than 65500 rows, be sure to select this option because the xlsx format does not have this limitation.
-
If your are adding the click action to a marker portlet, you can select Add Parent Information to include the dive path in the Excel file.
-
Click OK.
The Excel click action is added to the Click Action list.
-
If this is the only click action on the list, and you want the spreadsheet to display immediately when the click action is triggered, select Skip the menu when there is only one action.
-
Click OK to close the Click Actions dialog box.
-
Click OK to close the Edit Portlet dialog box.
-
On the toolbar, click Save to exit edit mode and lock the page.
See also:


